In Part 1 we looked at the basics of exposing parameters and exporting Substance 3D Designer packages as .sbsar or Substance 3D asset files. It is by no means a full overview of the process or it's advantages and disadvantages but it gets us primed for the second part.
In Part 2 we'll go over downloading and setting up the Substance 3D for Unreal Engine plugin. Importing .sbsar files into our project and working with them in editor.
Here's what we need for the Substance to Unreal workflow:
- Substance 3D Designer
- Unreal Engine 4 or 5
- Substance 3D for Unreal Engine plugin
For this part we'll need an UE installation (4 or 5). Access to the Unreal Engine Marketplace and an .sbsar file (go back to Part 1 if you don't know how to make one).
1. Plugin Setup
Epic Games Launcher makes this easy. Under Unreal Engine navigate to Marketplace and search for Substance 3D for Unreal Engine. Click the Free button which will then be replaced with an Install to Engine button. Choose desired engine version and you're set as soon as the instalation is completed.
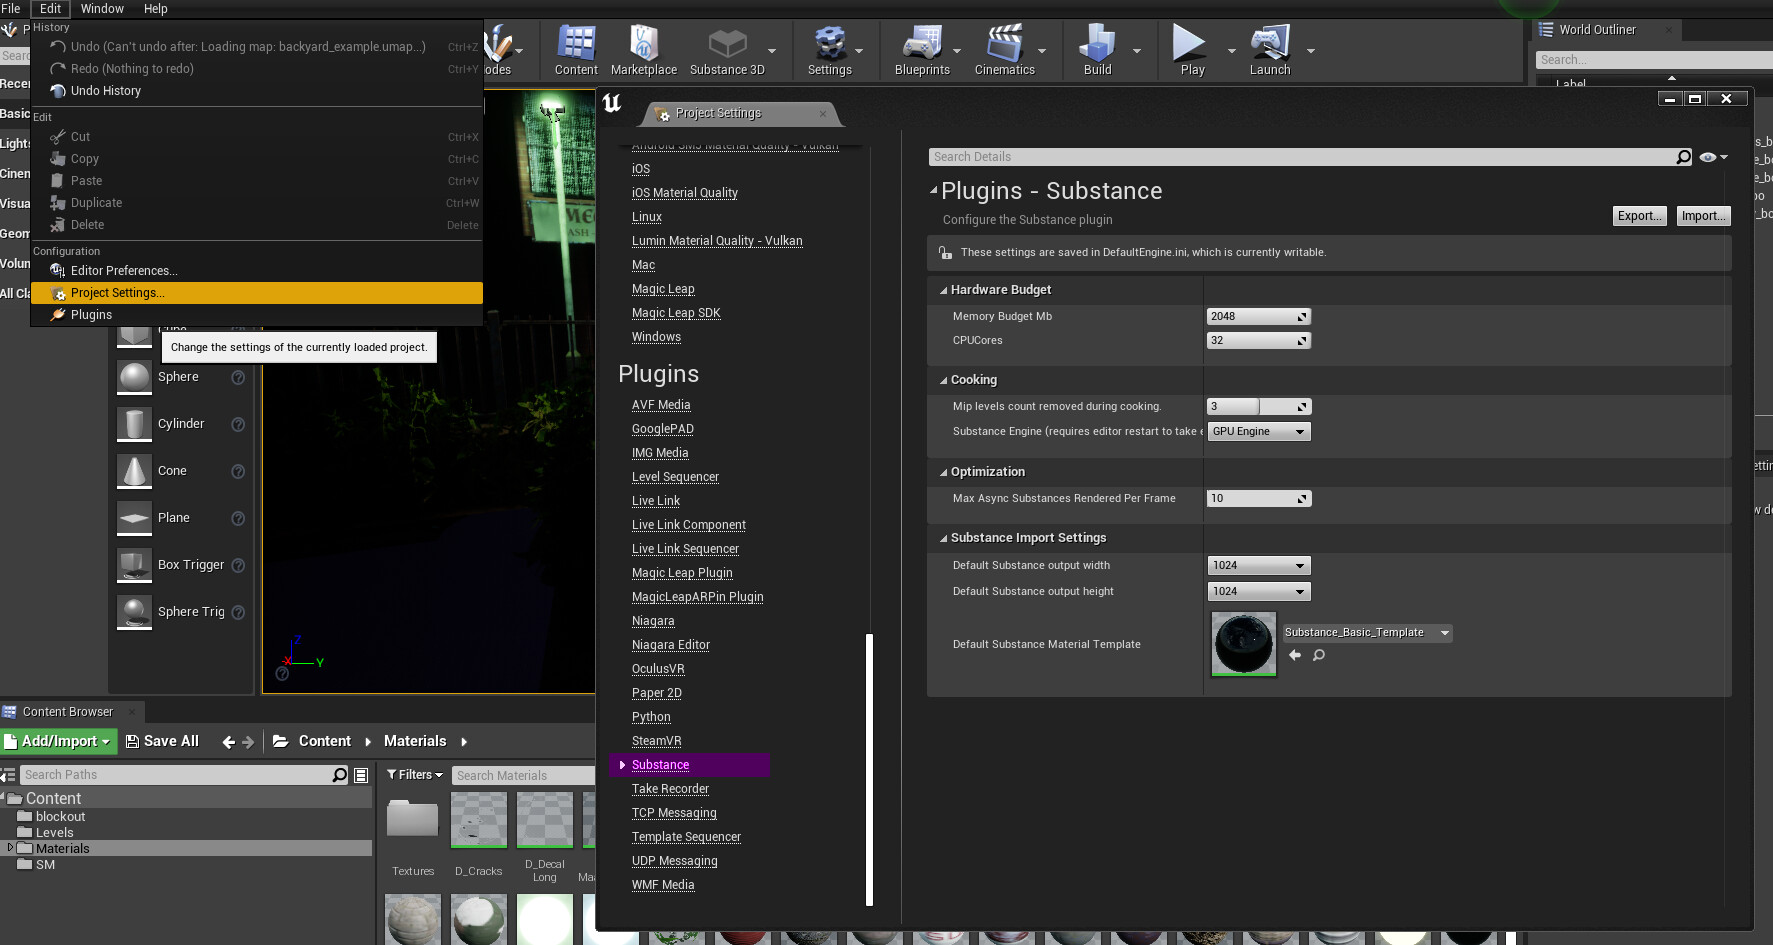
Next you need to open your project. From there navigate to Edit -> Plugins. In the search bar type Substance (note that UE4 steps are the same as UE5). By default the Substance plugin is unchecked, you'll have to enable it for each new project. The engine will prompt you to restart your editor before the plugin is usable.

Last part of the plugin setup takes us to Project Settings (Edit -> Project Settings). On the left hand side scroll down until you find Substance under Plugins. You'll be met with the menu seen below. You really don't need to change anything here but the documentation can be found here. Note that this also applies to UE4 for which the documentation is out of date.
2. Importing .sbsar Files
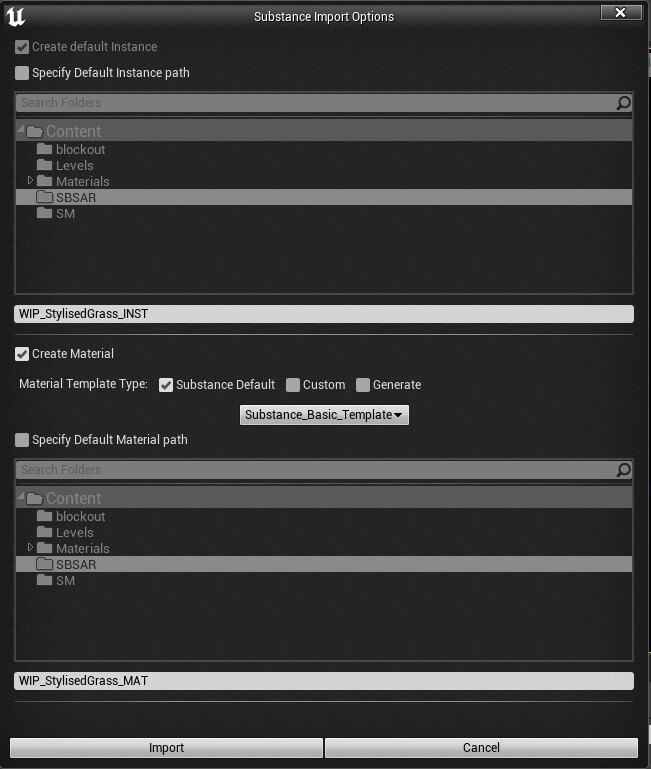
With the plugin enabled we can now add .sbsar files to our project. In Content Browser click the Add/Import button and navigate to your .sbsar file. You'll be greeted by the Substance Import Options window as seen below. This will repeat for every Substance graph you marked as Exposed in SBSAR.
Specify Default Instance path, when checked, lets you select where the particular instance (This is a Substance Graph Instance, not material instance) and textures it generates are imported to. You can right click into the browser window to add a new folder. Otherwise it'll import them into the currently selected Content Browser folder.
Input box below allows you to specify a custom name.
Create Material, when ticked, will create a Material Instance using textures generated by your Substance Graph Instance.
Material Template Type lets you choose Substance Default (4 premade templates to chose from), Custom (you can choose any existing material in your project), Generate (creates a new Material Template and an Instance of it).
Specify Default Material path, when checked, lets you select where the particular Material Instance is created. You can right click into the browser window to add a new folder. Otherwise it'll import them into the currently selected Content Browser folder.
Input box below allows you to specify a custom name (For the Material Instance, using textures from your Substance Graph Instance).
After importing all .sbsar file you will end up with something that looks like this. I decided to put my material instances into a separate folder for clarity. Also note the brief explainations of the two new file types that were imported.
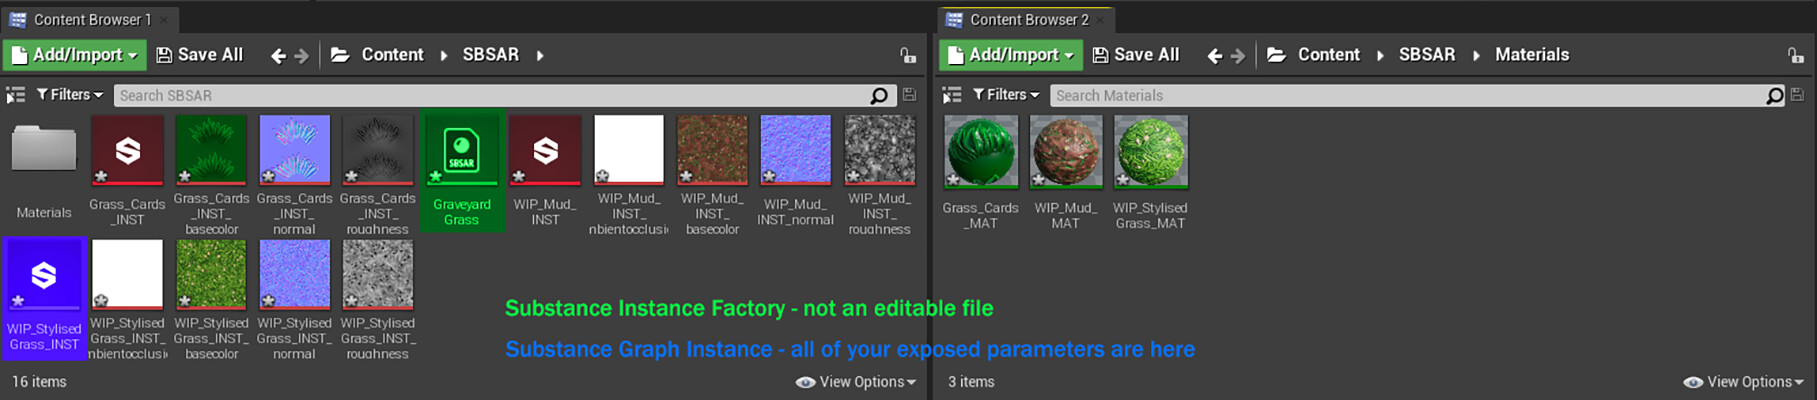
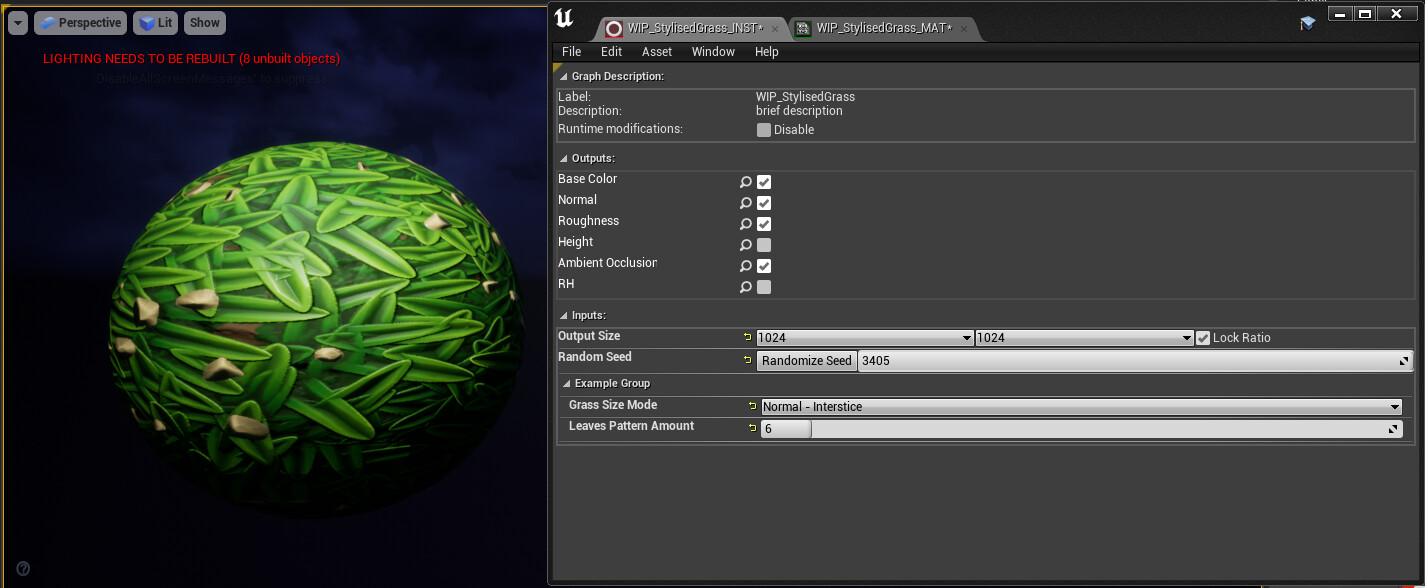
We'll focus on the Substance Graph Instance first. You don't apply those files to meshes, instead you apply the materials or material instances which use textures generated by those files. However when I open WIP_StylisedGrass_INST, we're greeted by the below screen.
First we have some information we added in Substance 3D Designer in Part 1 and a Runtime modifications checkbox, when selected it greys out the input area.
We can select which outputs will be generated as textures (I forgot to create a channel pack output for this substance, it's wip).
We can change the texture sizes using the Output Size dropdowns.
Our substance can be randomised using the Randomize Seed button or by typing a value into the coresponding input box.
Lastly we have our exposed parameters, grouped under the group we asigned them to in Substance 3D Designer.
Every single one of those settings can be adjusted, with the result updating imediately.
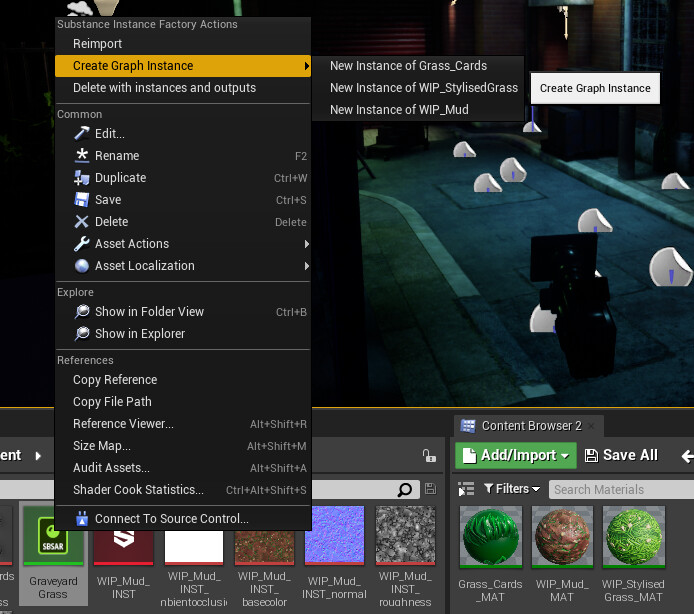
3. Substance Instance Factory
While this is not an editable file, like I mentioned earlier, It is essential. Mostly because it contains all of the actual .sbsar data(thus the icon). It's the place to create new Substance Graph Instances. Both for making new varieties of existing textures and importing ones that you didn't previously or deleted but want back. As long as the graph is set to be Exposed in SBSAR.
4. Additional Notes
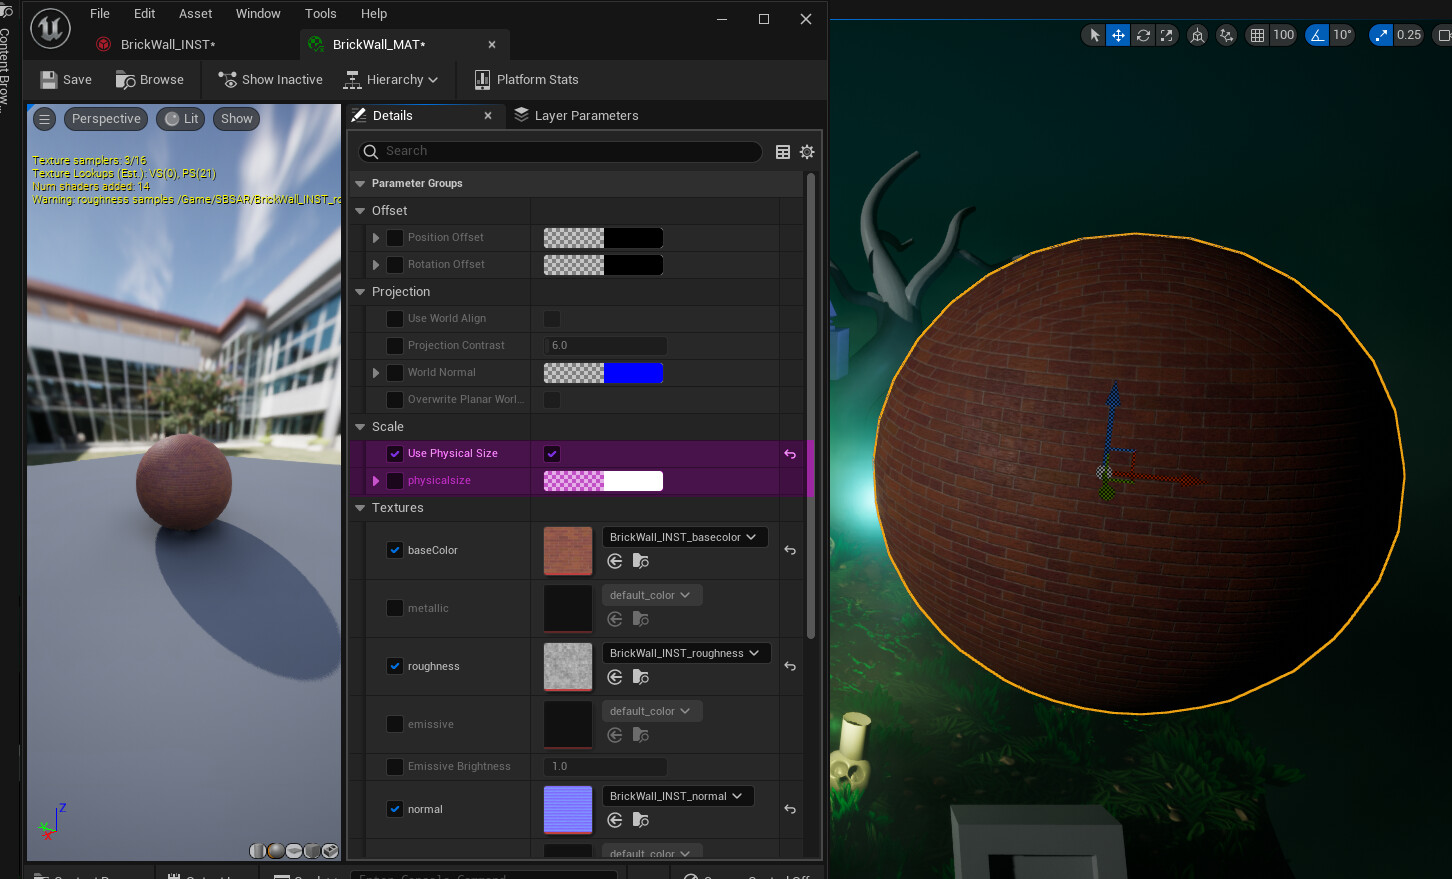
Physical Size
You may be wondering why all the way back in Part 1 we bothered to give our substance Physical size (cm). This particular set of values does not come into play until we are in Unreal Engine 5, using our substance with a Substance TriPlanar Material Template. Checking the Use Physical Size tickbox inside the material instance allows us to use the size we set inside of our graph Attributes for triplanar projection. Eliminating the need to figure out correct tiling ratios.
Procedural Filters in Unreal
Substance 3D Designer not only allows us to create custom Output nodes (Base Color, Normal, Roughness... those are all just output nodes with custom names). It also allows us to create custom Input nodes. Which means we can operate on textures already inside of Unreal to get something new!
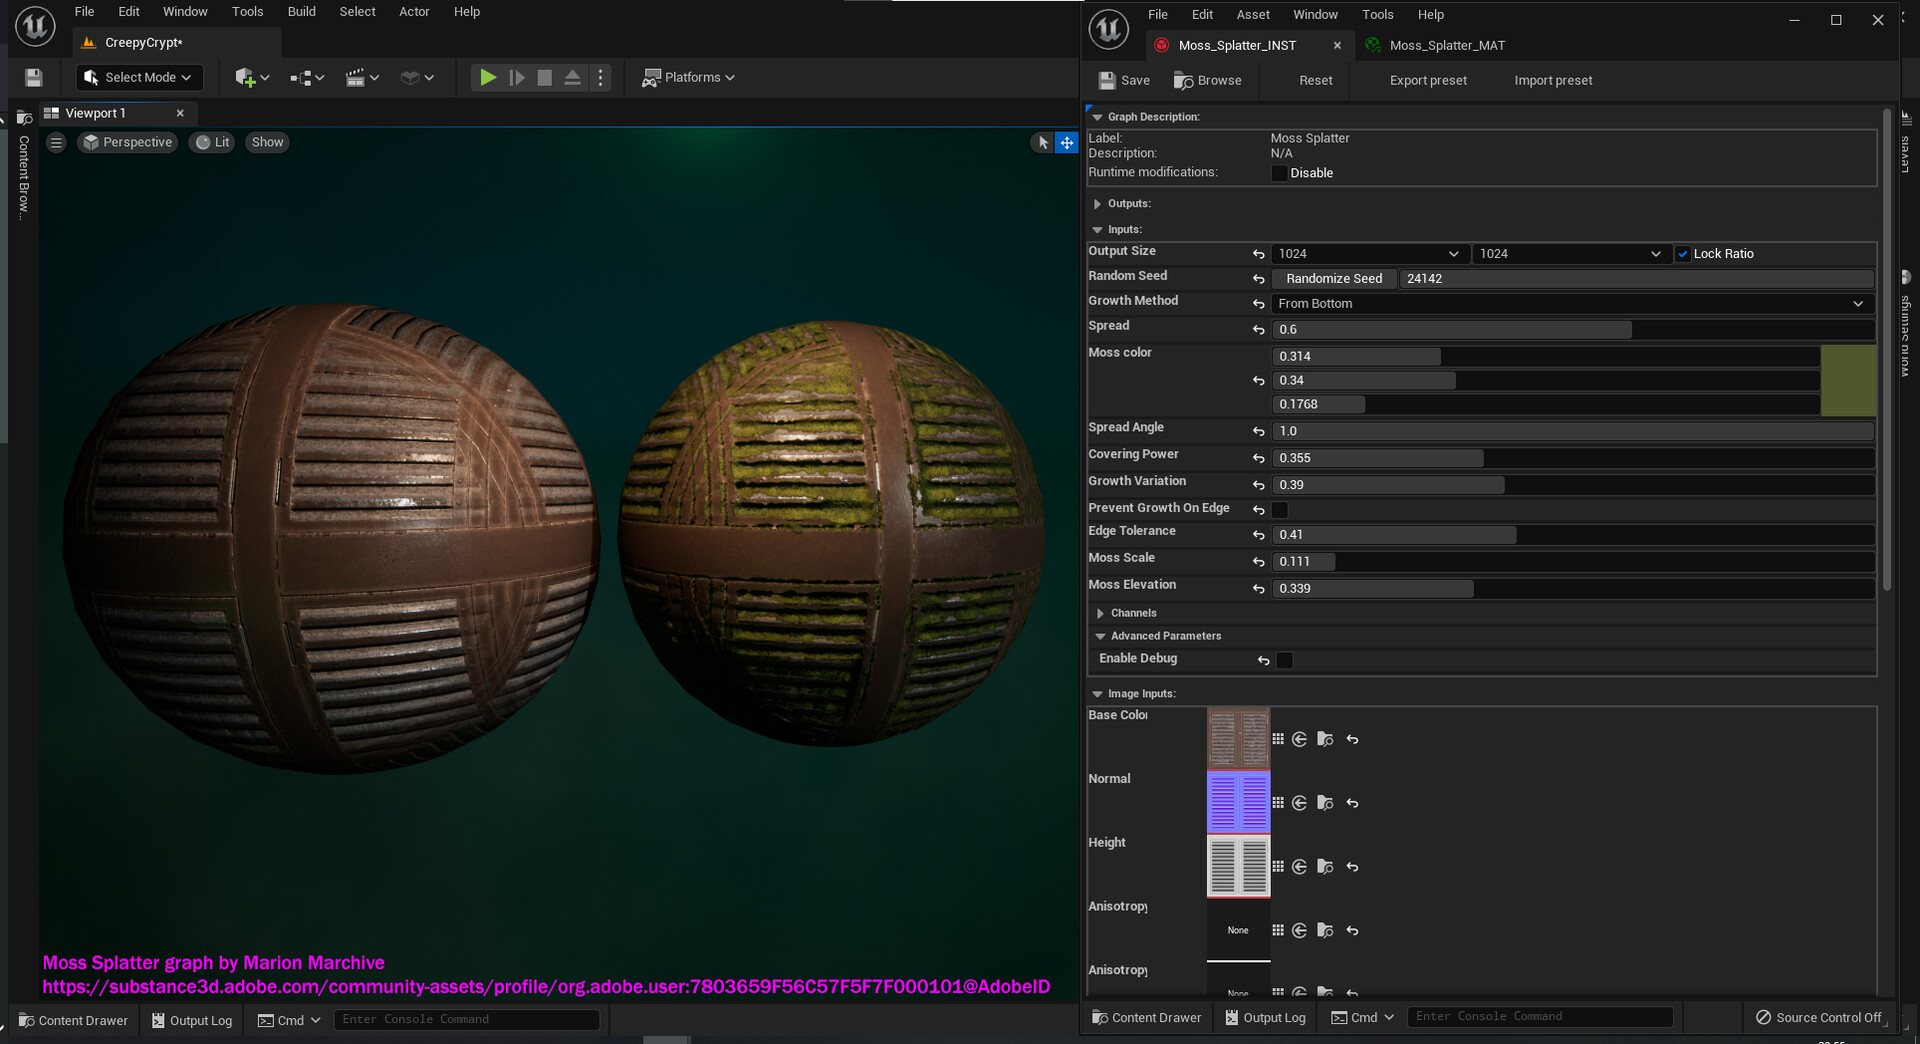
Moss Splatter .sbsar by Marion Marchive.
This concludes the intro to Substance 3D Designer to Unreal Engine workflow.
Official documentation for Substance to Unreal plugins can be found here.