Today we're going to look at publishing your first Substance 3D Designer package as a .sbsar or Substance 3D asset file. There are many advantages to doing this. Exposed parameters and map sizes can be adjusted on the fly with no loss of quality. Texture varieties can be made this way without having to go back to Designer.
In the second part we'll go over setting them up in Unreal. The reason I'm breaking this into two parts is because published .sbsar files have many uses, not limited to Unreal Engine.
Here's what we need for the Substance to Unreal workflow:
- Substance 3D Designer
- Unreal Engine 4 or 5
- Substance 3D for Unreal Engine plugin
But for this part all you need is Substance 3D Designer.
1. Setting up your Designer files
We'll be working with a little unfinished file of mine called GraveyardGrass.
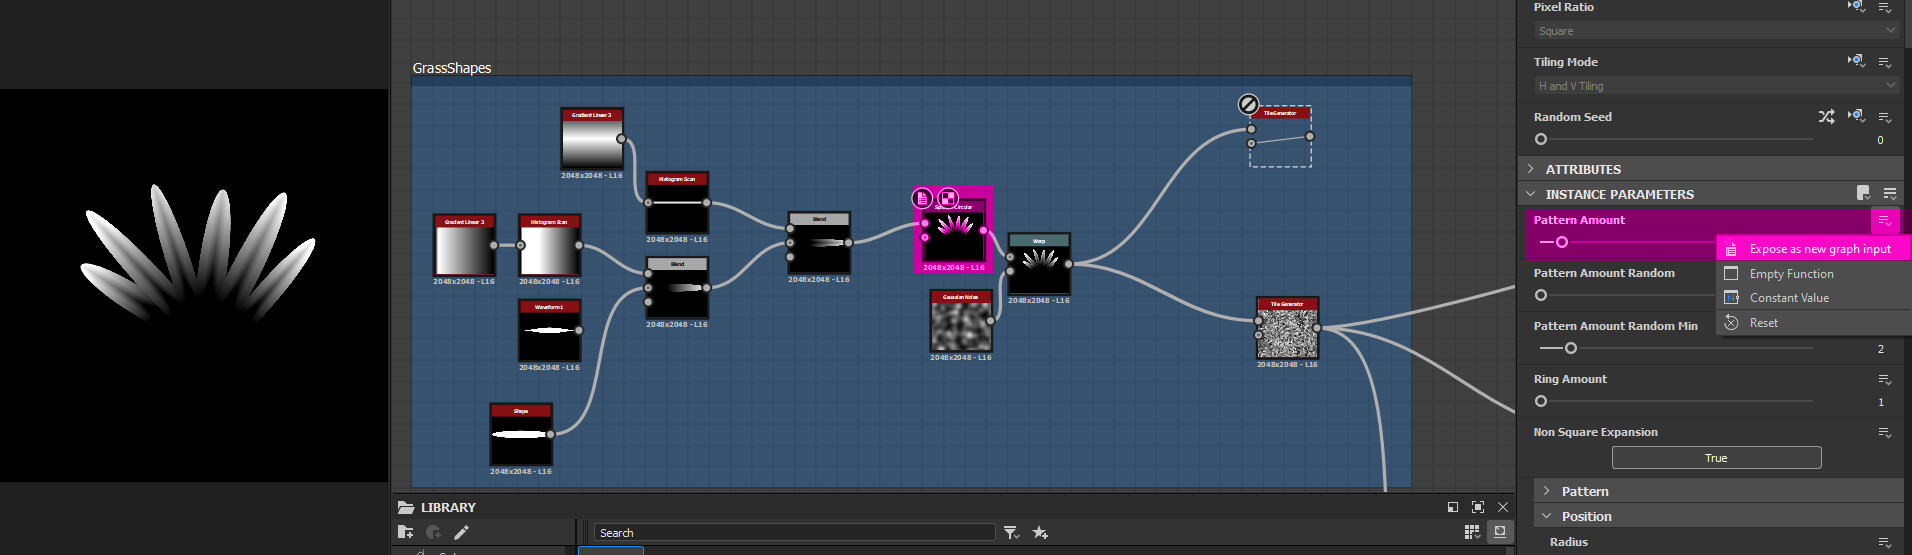
Most nodes inside Designer will have parameters that can be exposed, those can be sliders, drop downs, booleans, etc. In the image below I selected a Splatter Circular node in my graph and clicked on the Hamburger Menu (3 line dropdown) next to the Pattern Amount slider parameter.
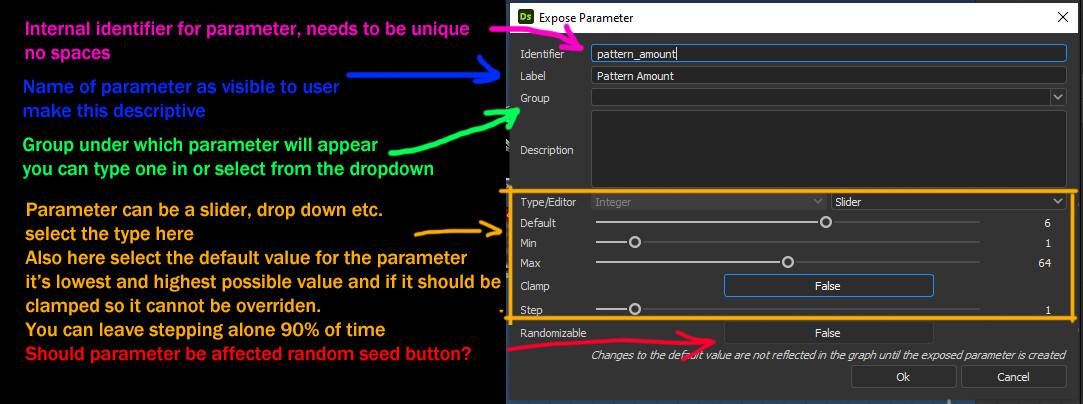
This brings up the Expose Parameter menu. Image below goes over the basics of what's here. Note that changing the Type/Editor dropdowns will give us a different set of settings but for the purpose of this post we'll just be working with sliders and a drop down menu.
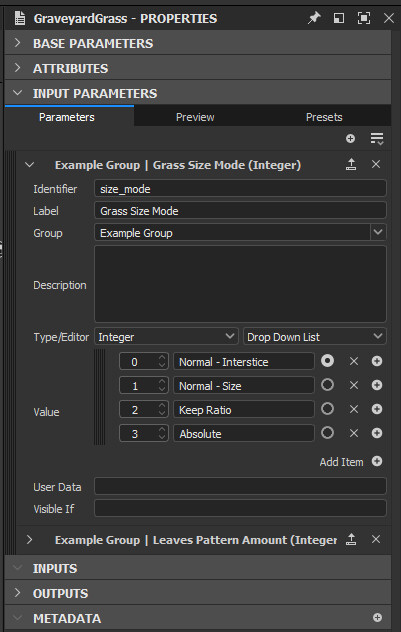
Once you exposed all the parameters you need, you can click on the name of your graph in the Explorer and find the Input Parameters pane. Located under Properties, on the right hand side by default. Here you can edit, preview and create presets for your parameters. Note the below screenshot uses integer (whole numbers) in a drop down list unlike the slider above (which also uses integer for Type but is a slider).
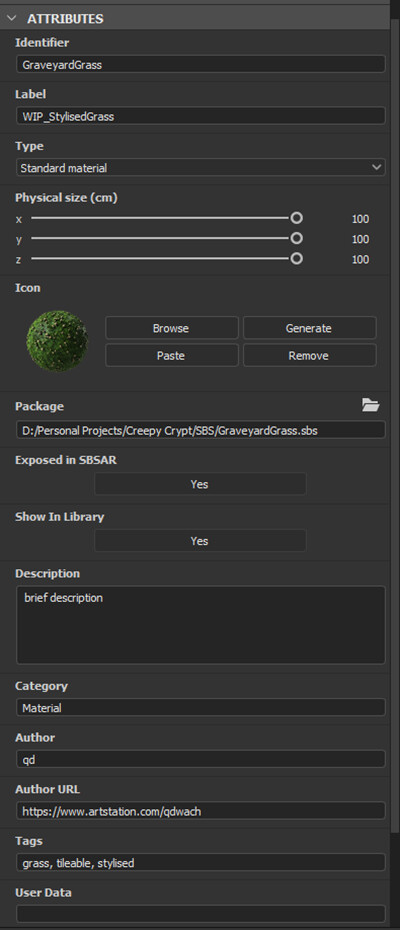
Last step before we are ready for publishing are graph Attributes. Found in the same area as Input Parameters. There's a couple of useful settings here.
Identifier is the unique graph name (by default the the name of your graph in Explorer).
Label is human readable name for your graph in other software.
Type lets you select predefined type of your graph. Is it a filter or a generator? Perhaps just a standard material?
Physical size (cm) describes the dimensions of your material in real life units. For example my patch of grass is about 1 square metres.
You can generate an Icon for your substance graph or use a custom one.
The most important setting here is Exposed in SBSAR. Which lets you choose whether the graph you're editing will be visible and usable in your .sbsar file (You always publish the whole package, not individual graphs). Perhaps you have a network for generating bricks that you then use in a wall substance, it probably does not need to be exposed in sbsar. Show in Library determines if the graph will be loaded into your Designer Library when saved to one of the Library watched paths. But that's a bit out of scope for this post. Rest are pretty obvious.
2. Publishing an SBSAR file

First an important note:
SBSAR files can be loaded into Substance 3D Designer but their graphs CANNOT BE EDITED.
You'll need to use the original .sbs file if you want to gaze upon the graphs again. However the exposed parameters will work same as in any other node.
Publishing is pretty simple, select your package in the Explorer and click the Publish icon as seen in the image below. Here you can also send your package directly to Substance 3D Painter or Player. Clicking Publish .sbsar file makes the Substance 3D asset publish options window pop up. Here you can generate any missing icons and change the compression settings on any bitmaps embeded with your graphs.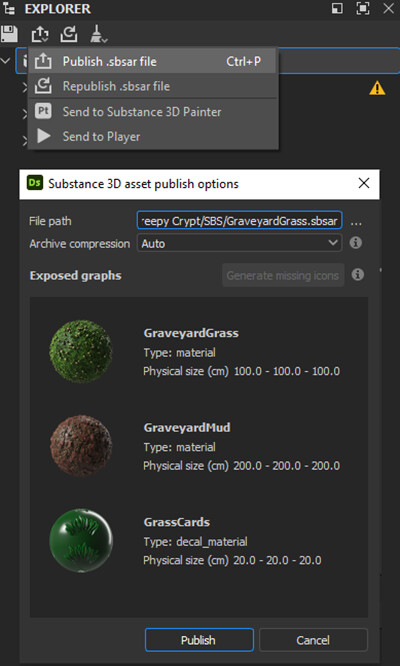
And that's about it for the basics of exposing parameters and publishing .sbsar files from Substance 3D Designer. This is by no means a complete overview so I invite you to review Adobe's documentation which goes into much more detail:
In part 2 we'll look at plugin setup and working with .sbsar files in Unreal Engine.