In this short tutorial we will have a look at Material Parameter Collections, what they are and how to use them. Material Parameter Collections are a powerful tool for artists.
1. What are Material Parameter Collections?
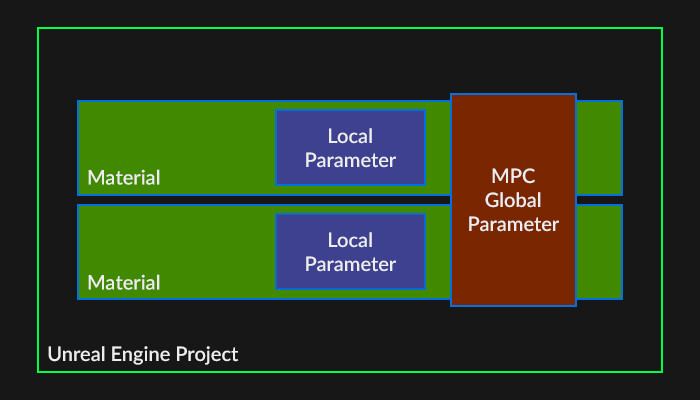
Material Parameter Collection or MPC (which is how I will refer to them from now on) is a unique type of Unreal Engine asset that allows you to store multiple Scalar (single float value) and Vector4 (R,G,B,A) Parameters globally. What do I mean by that? In short, there are two ways to create (or "declare") parameters (or "variables"). Locally, inside of a material or Globally, inside the UE project you are working in. Local parameters can only be access inside a Material and its Instances. Global parameters can be accessed anywhere from within the project.
1.1 But why is that useful?
Inside of the Unreal Material Editor you can find a node called CollectionParameter which allows access to a parameter stored inside of a MPC (more on that later). As many materials as you like can access this same parameter this way at the same time. When this parameter is changed, all the materials that access it will also change accordingly. Because they all access the same parameter.

For example the amount of desaturation on all materials in your scene, controlled by a parameter inside a MPC.
2. Creating my first MPC.
For this tutorial I will be creating a Scalar Parameter to desaturate my scene and a Vector Parameter to control colour tinting some emissives. I will manipulate those Global Parameters inside the Level Blueprint.
Lets get started!
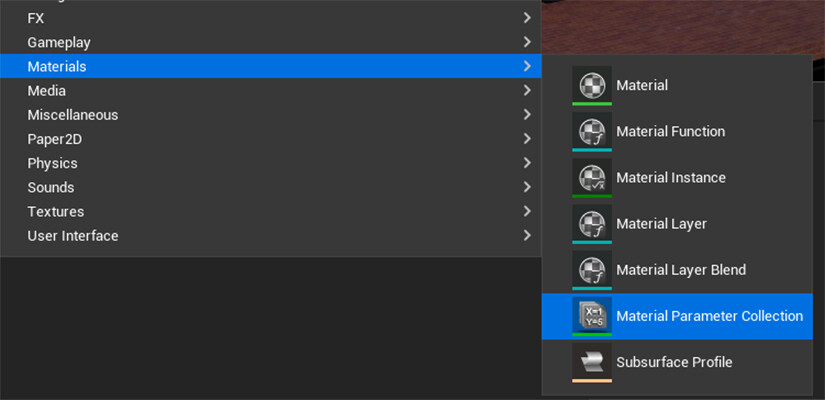
I right click inside the Content Browser and go to Materials (Materials & Textures in UE4) -> Material Parameter Collection. I'm calling mine MPC_Colours (MPC_ is the common naming convention).
I open the MPC and am greeted with a simple menu with two Arrays; Scalar Parameters(Float) and Vector Parameters (Vector4) .Currently no other types are available. I click + next to the Scalar array and then expand the newly created param at Index [0]. Inside I find a Default Value field and Parameter Name input. I repeat this for Vector array except the default value is a Color Picker which I can further expand for individual numeric values.
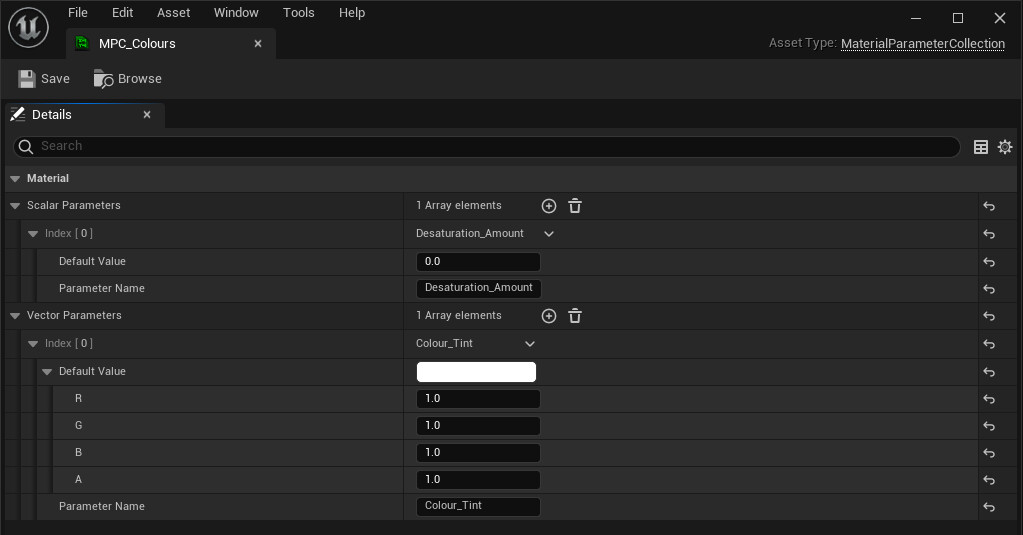
I input my names and set default values of 0.0 and White(1,1,1,1) then Save. Well done me! Just made my first MPC. I'm sure Epic will be in touch to offer me a lead tech artist position shortly.
One MPC can contain 1024 of each type of parameter.
2.1 Implementing my MPC in a simple Material.
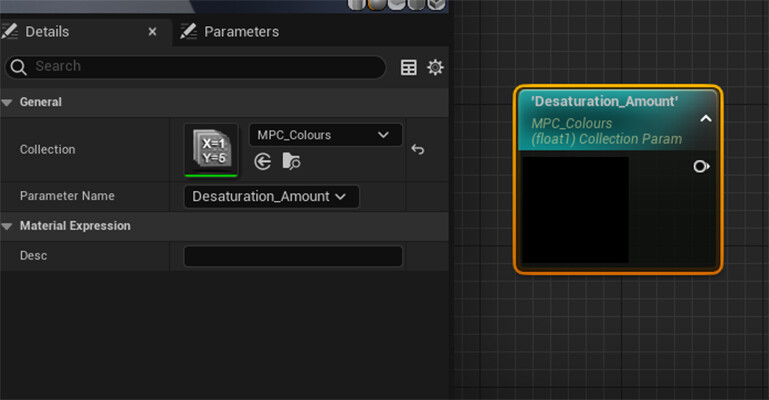
I creat a new material, throw in some textures and then in Palette I search for CollectionParameter which I pull into my graph. Inside it I select my MPC from the Collection dropdown, then select my Desaturation_Amount from the Parameter Name dropdown. It looks like this.
Last I find a Desaturation node, connect my Base Color sample at the top and the CollectionParameter (now conveniently named "Desaturation_Amount") to the Fraction input. This is what I end up with.
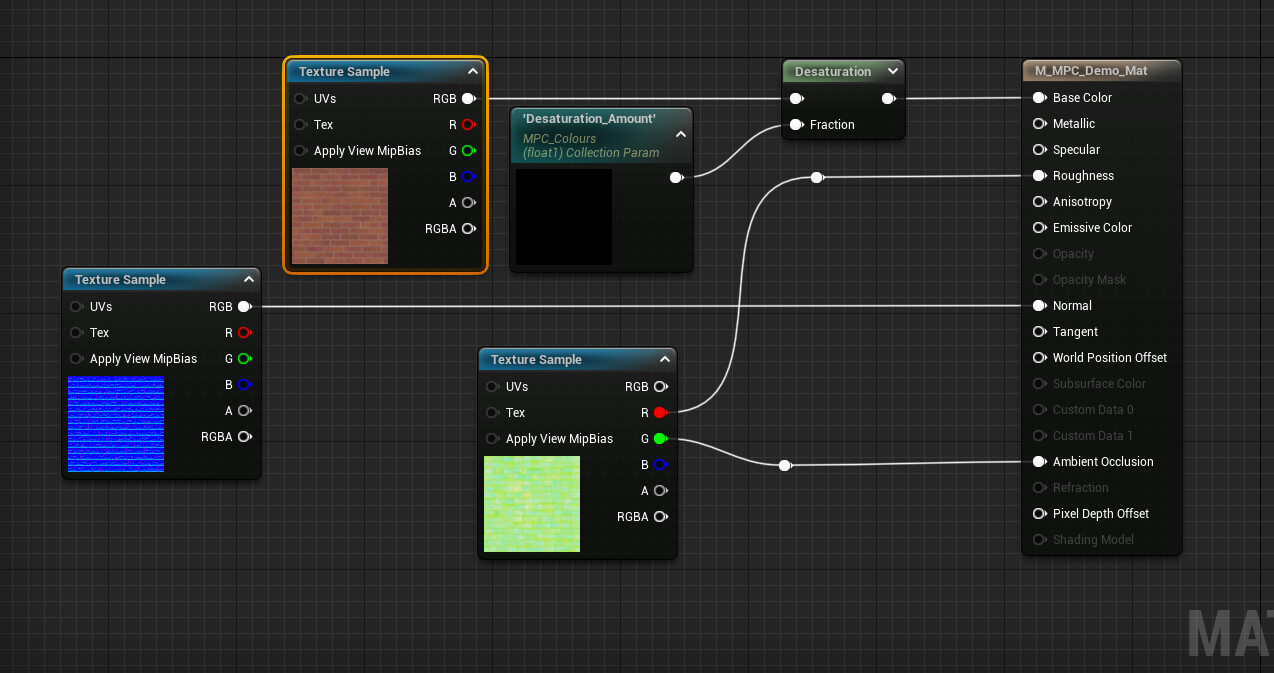
Take note that you cannot change the value of Desaturation_Amount inside the material or its instances. But you can perform operations on it. For example by multiplying it by a Local (one made inside the material) parameter.
2.2 Changing the value of Desaturation_Amount.
I want to be able to change my Desaturation_Amount whenever I press and hold the Spacebar. To do this using my Global Parameter I go into Level Blueprint.
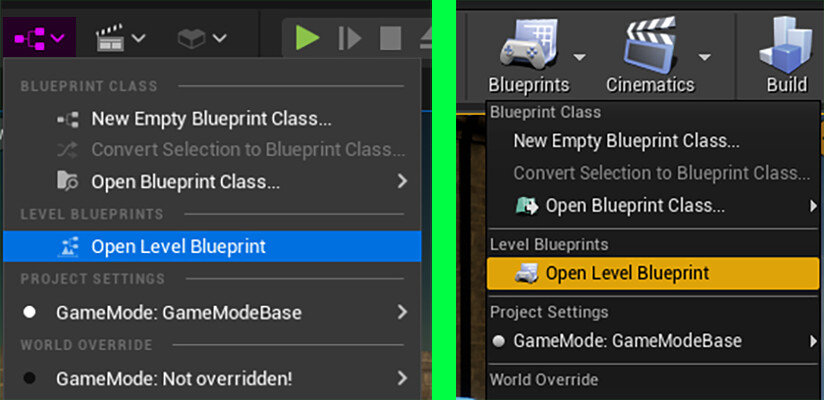
First I add a Set Scalar Parameter Value node (you want the material collection instance one specifically), from Collection dropdown I select MPC_ Colours and from Parameter Name Desaturation_Amount. Next I add a new Float Variable called Desaturate and pull it into the graph as a Get. Which I then connect to the Parameter Value on my Set Scalar Parameter Value node. Then once again I pull Desaturate into the graph as a Set, which I then duplicate. First Set has a value is 1.0, second a value of 0.0. I connect the Exec outputs of both to the Exec input of my Set Scalar Parameter Value. Lastly I add a Space Bar node to my graph, connecting its Pressed Exec to Set Desaturate with value 1.0 and the Released Exec to the one with value of 0.0.
It looks like this:

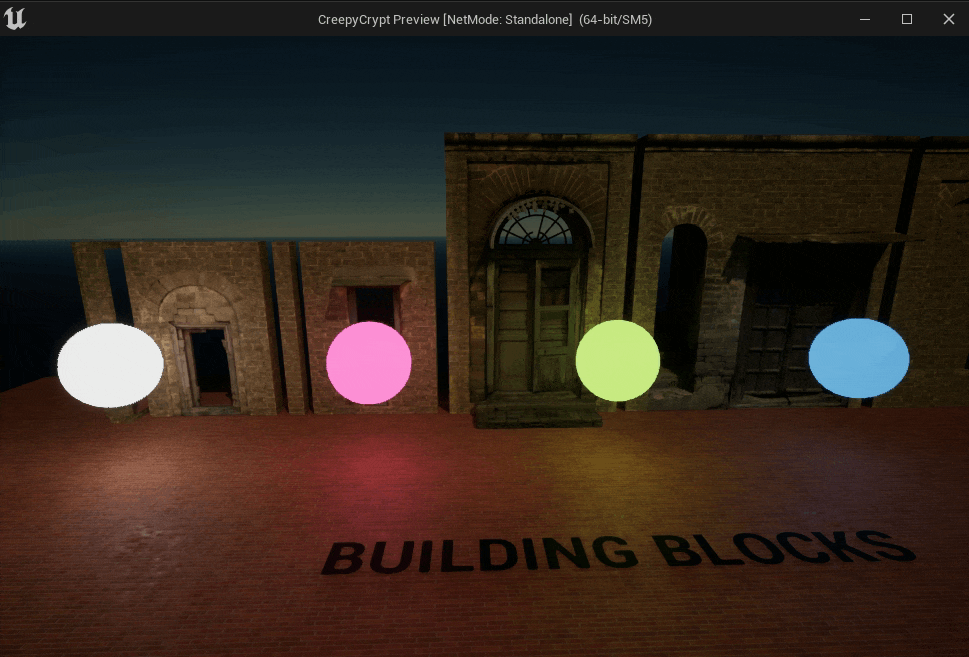
Now when I play my level and press and hold the space bar, all materials which use the Desaturation_Amount function I made will go grayscale. I took the liberty of applying that logic to a number of materials in my scene.
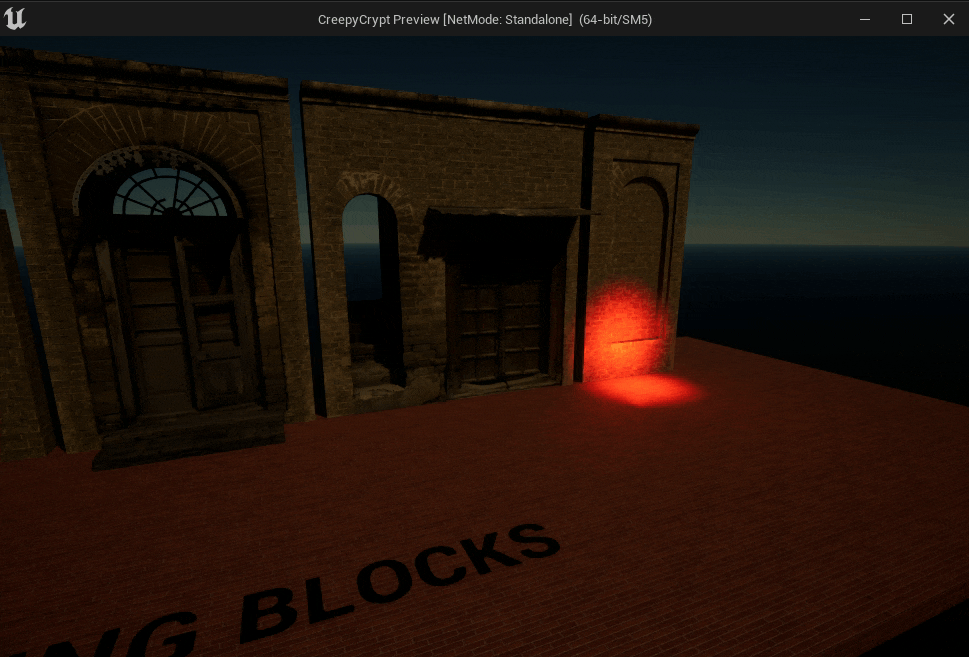
Notice how desaturation only affects the materials and not the red light in the corner. MATERIAL Parameter Collection.
2.3 Using the Vector Parameter.
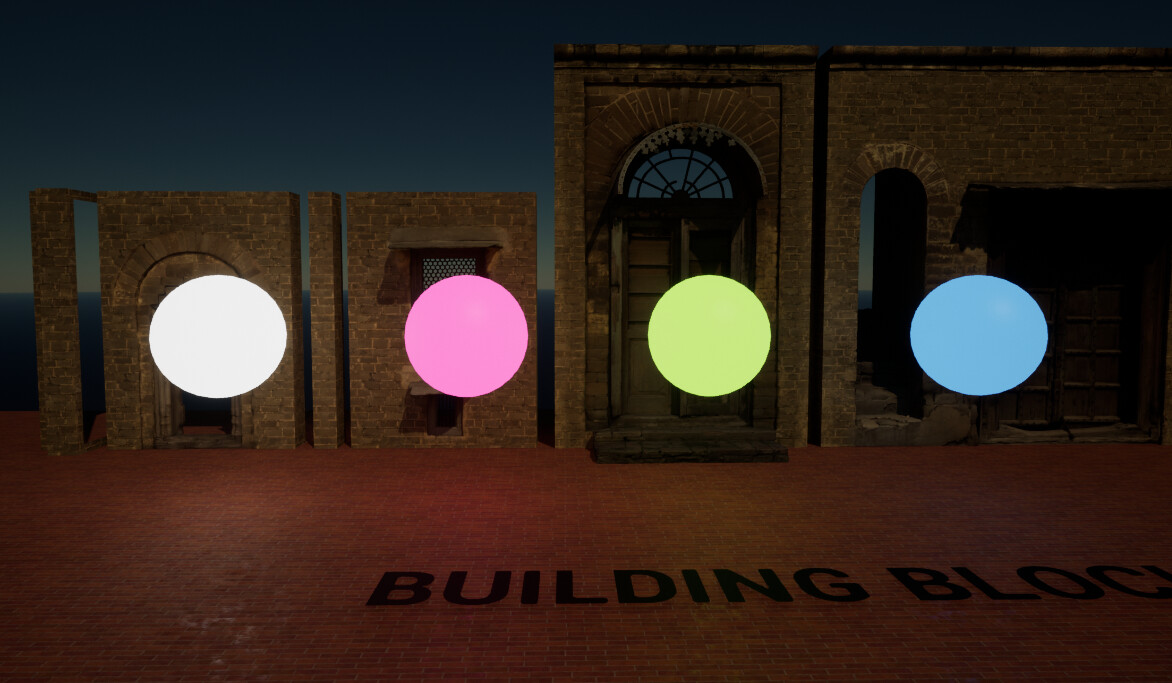
I want to use my Colour_Tint param from MPC_Colours to make some constantly colour shifting emissive lights. I also want to have multiple instances that start from different colours to show how that will be affected by my MPC param.
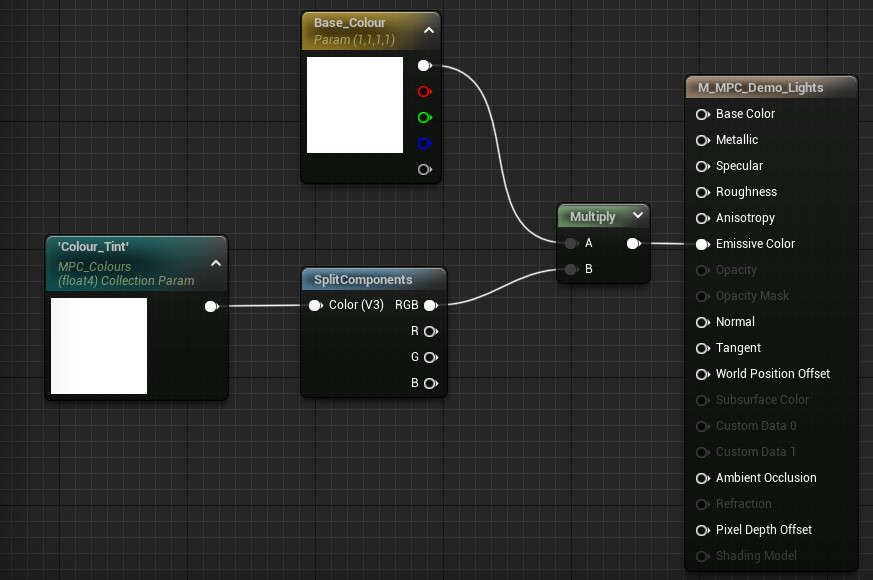
First I make my Material, using Colour_Tint in the CollectionParameter this time. I use a SplitComponents node here to compress my Colour_Tint (Vector4) down to a Vector3 (R,G,B). It ends up looking like this:
I make 3 Instances with different base emissive colours and apply each to 4 spheres I have in my scene.
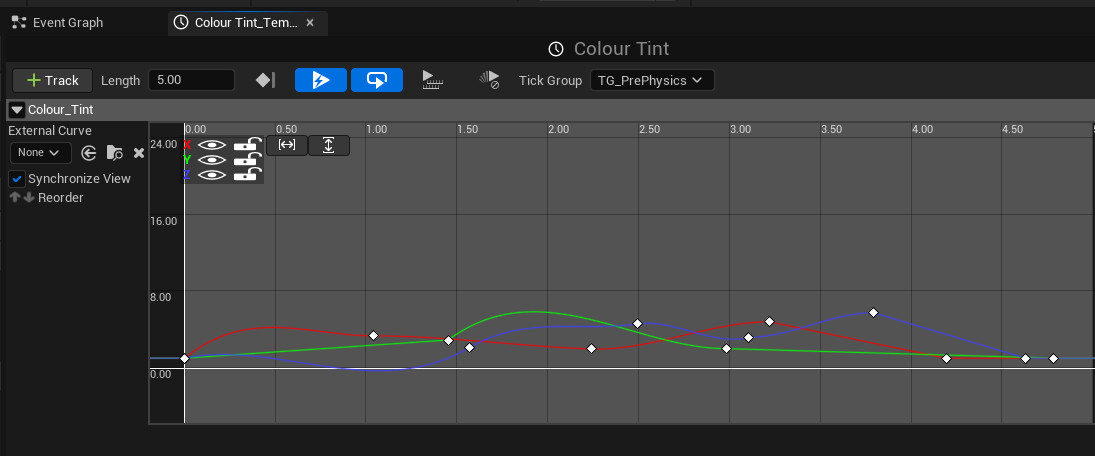
Now back to the Level Blueprint. I add a Set Vector Parameter Value (the material instance one) and select my MPC_Colours Collection and Colour_Tint Parameter Name. I create a new Linear Color Variable called Colour_Tint pull it into the graph as a Get and connect it to Parameter Value input. I pull it again as a Set and connect its Exec output to the Set Vector node Exec input. I add a Timeline node and name it Colour Tint. Double click that and add a Vector Track and create a couple of keys for each colour. It looks like this:
Creating and editing Timelines is out of scope of this tutorial but you can learn more here:
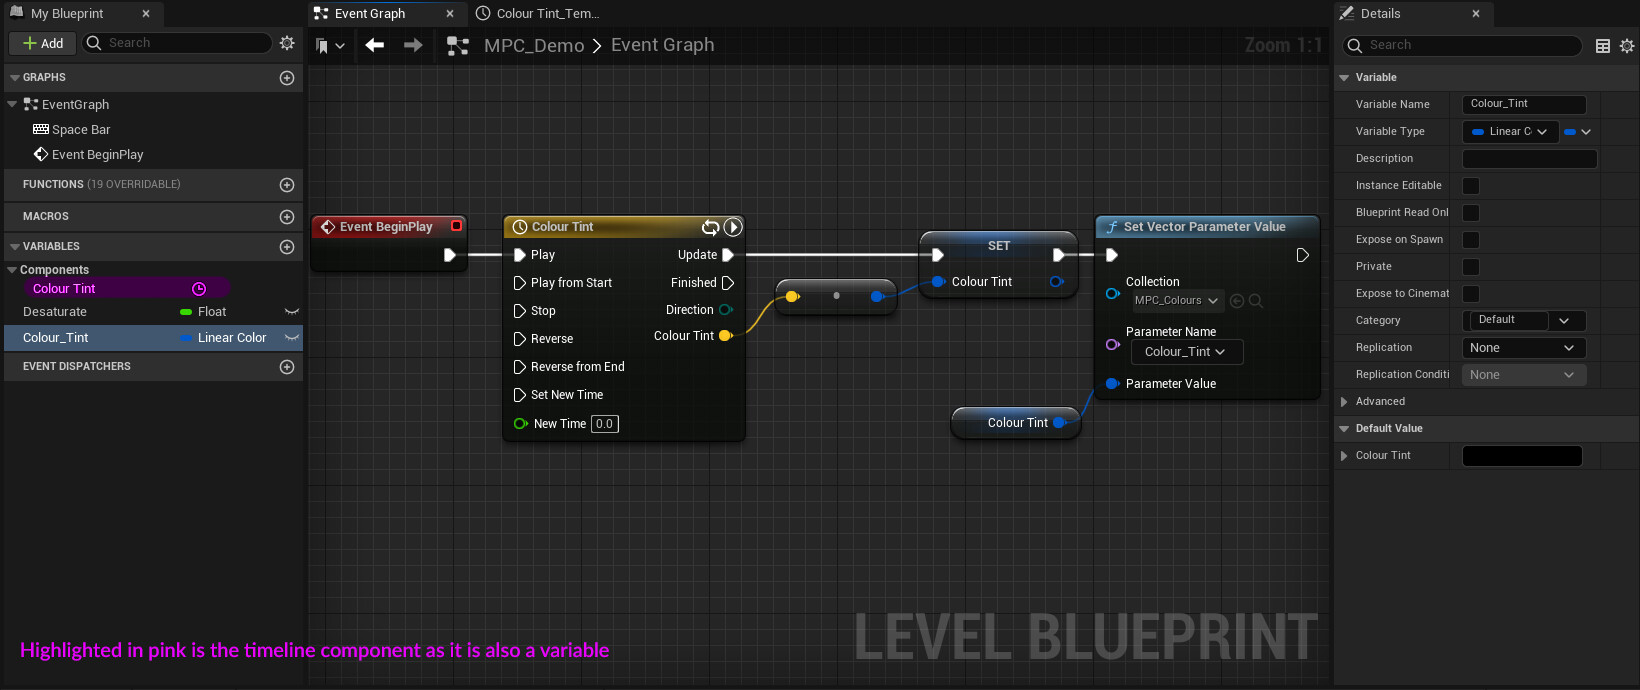
Back in the Event Graph I connect the new Colour Tint Vector output (orange) to Set Colour Tint. Node that converts Vector to Linear Colour is added automatically (I could have also used linear colour in the first place). Then connect the Exec pins together. Last I add an Event BeginPlay node and connect it to the Play Exec input of the timeline. This way the Colour_Tint will start shifting over the timeline when I begin playing my scene. My graph looks like this:
3. Conclusion
This concludes the introduction to Material Parameter Collections. An incredibly powerful but easy to use Material Asset Class.
There are some limitation to keep in mind when working with MPC. They can only contain 1024 of each type of parameter. Modifying the number of parameters in a collection causes a shader recompile for each material that references it. Material can only reference up to 2 MPCs (but unlimited number of parameters from them).
And most importantly, renaming a parameter will break any Blueprints that use it until it is reasigned by hand.
Additional Resources:
I almost forgot! Sequencer has a MPC track that can be used to animate your parameters. Read more about this straightforward but powerful tool here: