This is an updated version of a previous tutorial which sucked ;)
Today I'm going to talk about working with Deferred Decals in Unreal Engine. But first I will run through my Maya (and 3ds Max) through Substance 3D (Painter and Designer) to Unreal Engine authoring workflow. This is a beginner level tutorial.
1. What is a Deferred Decal?
Deferred Decals (or just Decals, which is what I will be calling them from now on) are Materials that are projected onto meshes in your level, including Static Meshes and Skeletal Meshes. Decals are NOT meshes but rather materials placed on top of a mesh (or multiple meshes) using Planar Projection (flat projection in a single direction) helpfully indicated by a blue arrow just under the decal icon. The green, transparent Decal Bounding Box is the container inside of which projection happens.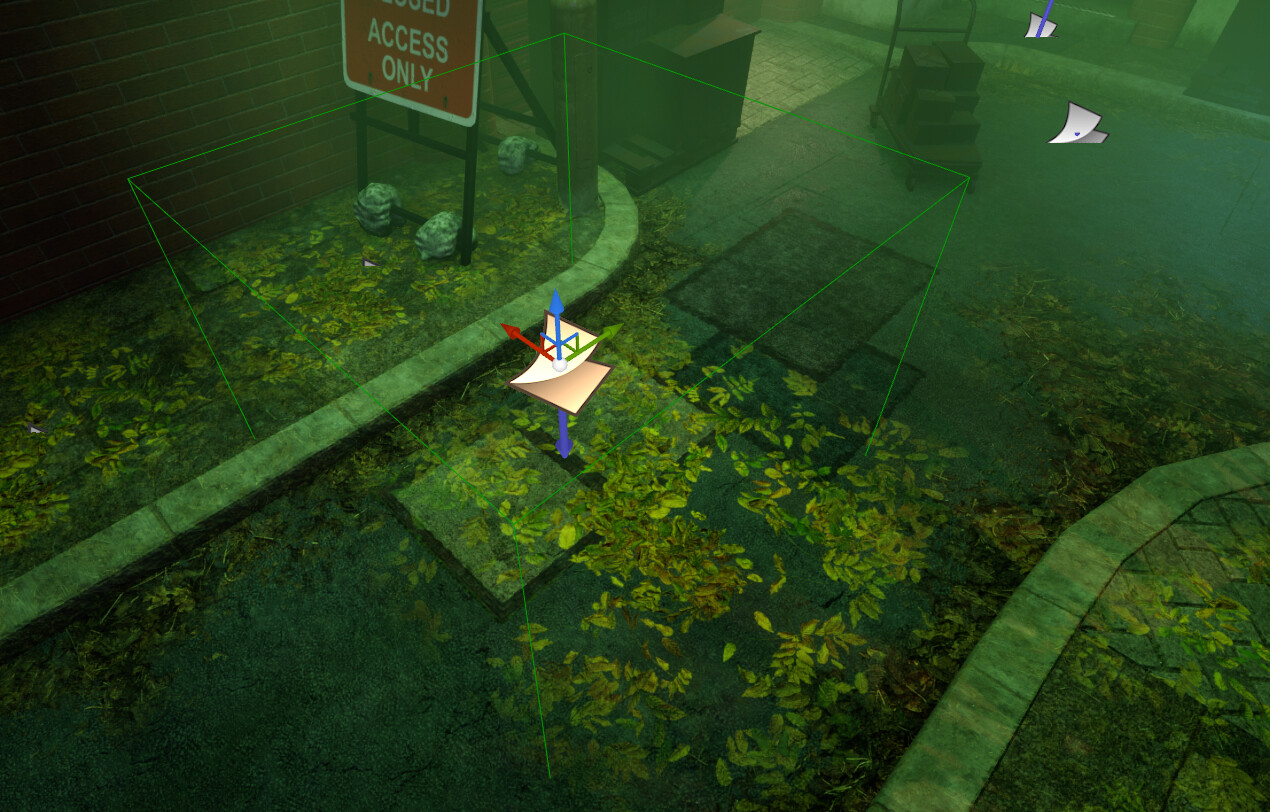
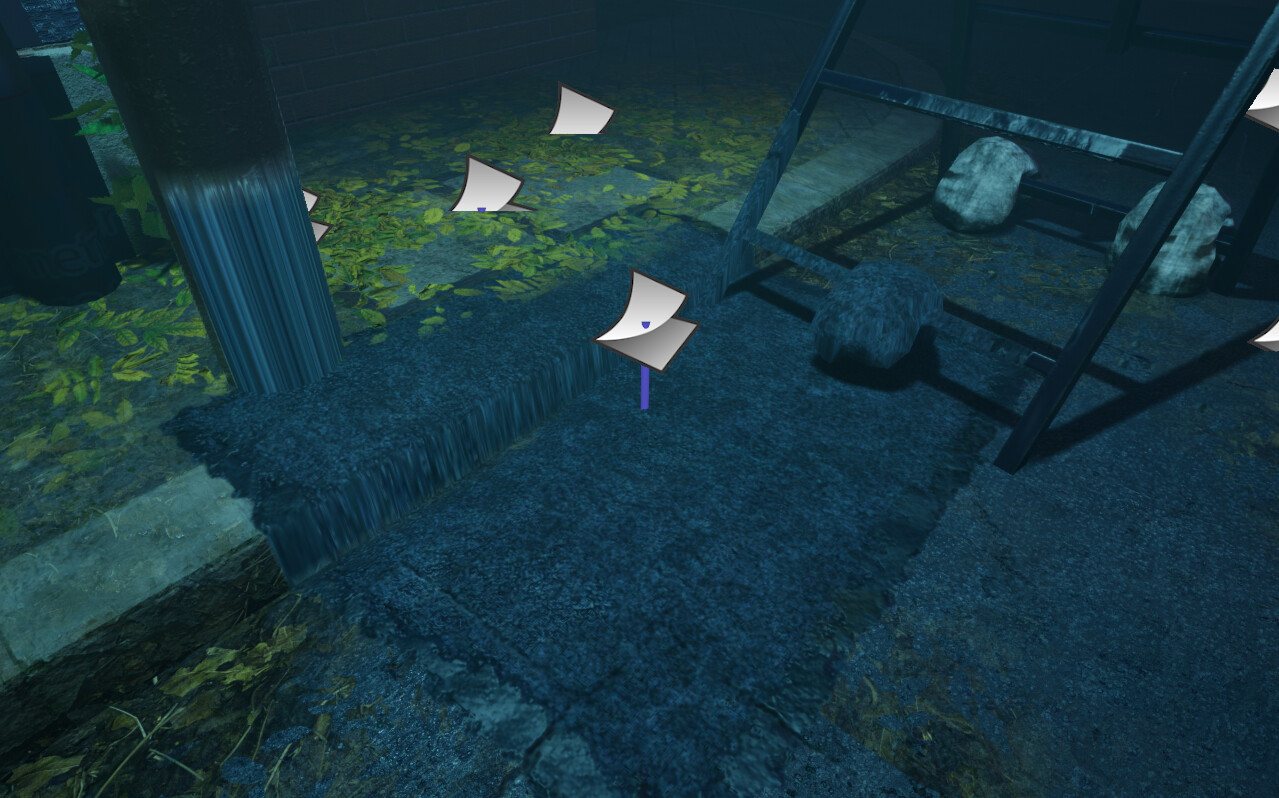
Decals are best used for breaking up repeating textures and geometry, making your scene feel unique and more detailed. This could be scattered leaves, a patch of asphalt or cracks in a wall. Most decals use transparency, which creates the illusion of a unique shape and helps blend it into the environment seamlessly. We'll look at how to work with transparency in just a minute.
1.1 Considerations and limitations of Decals
Multiple Decals can be placed in your scene at once without impacting performance. However more complex Decal Materials may eventually start causing performance dropoff, especially close up when they take up significant amount of Screen Space (Screen Space is what you see on the screen or the display area available on your monitor, TV or any other form of display). Decals are best (but not exclusively) used on fairly flat surfaces, as more complex surfaces can result in stretching artifacts.
2. Authoring my first Decal.
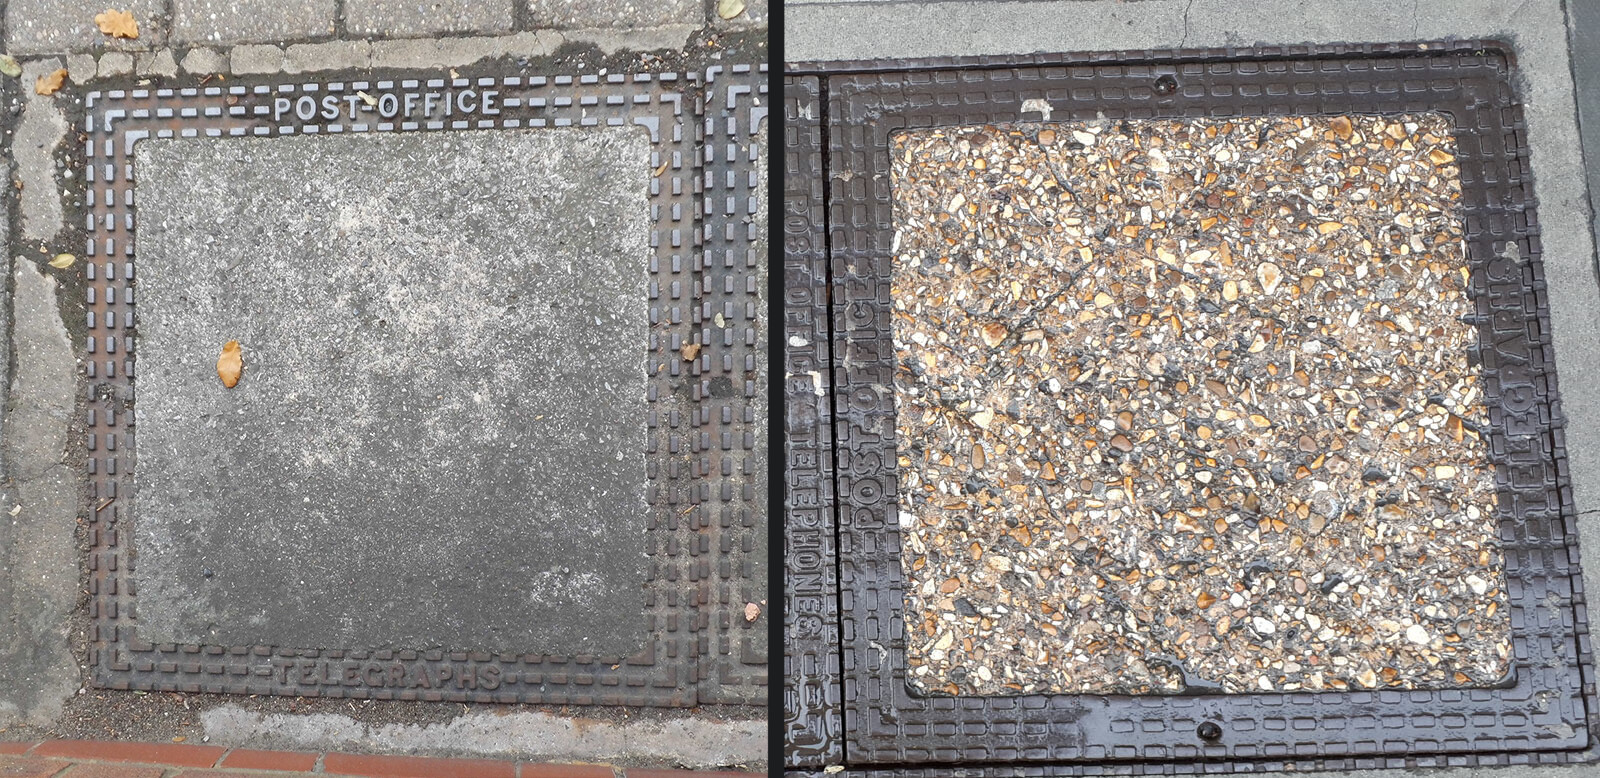
I'm going to be making a manhole cover:
2.1 Creating Material ID Masks.
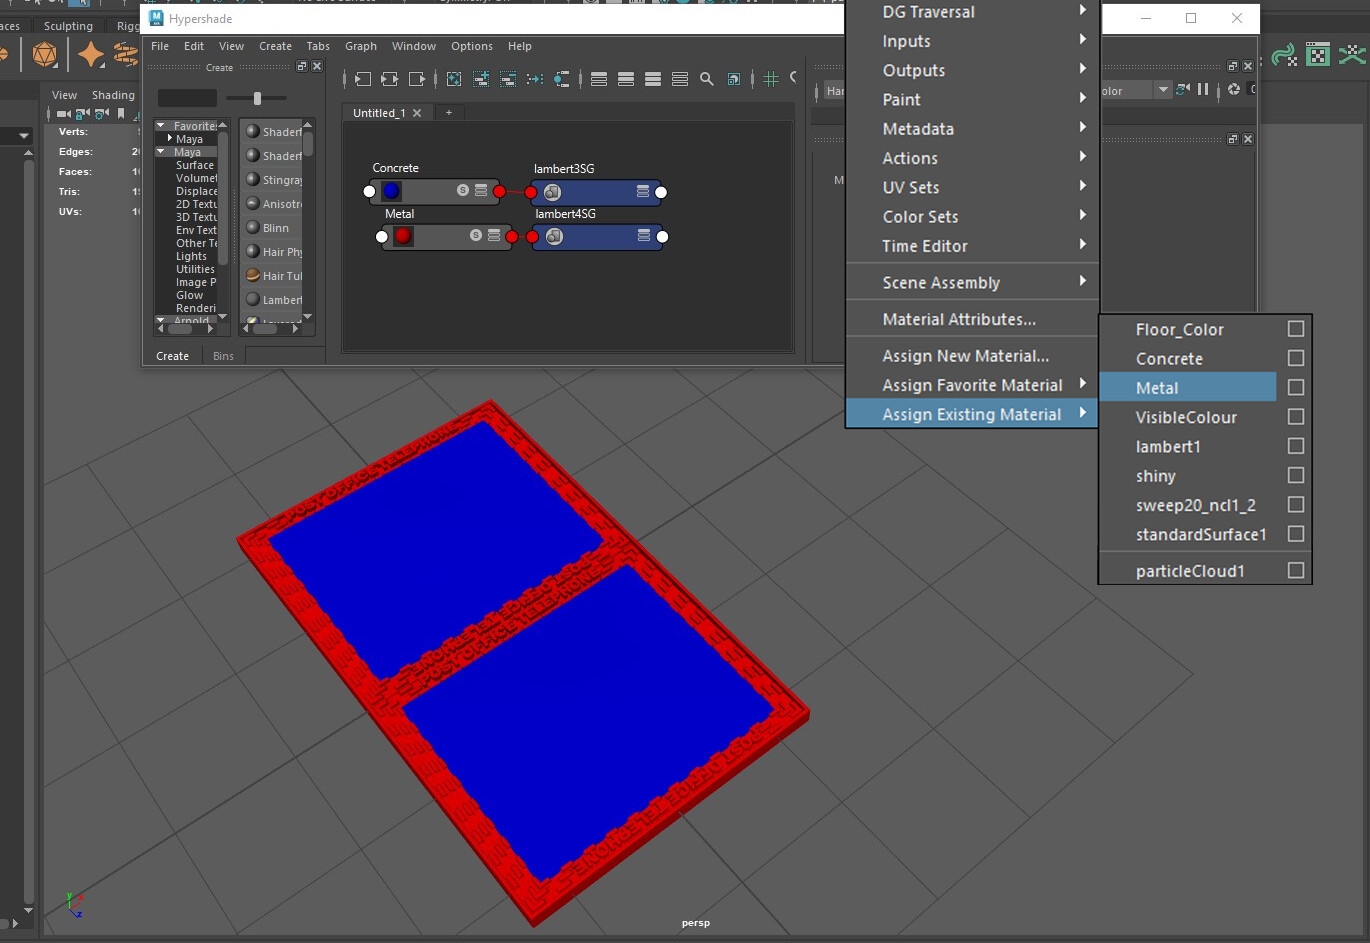
I use the standard Subdiv Modelling workflow in Maya to make the high poly of my manhole cover (check out the linked Polycount Wiki article to learn about Subdiv Modelling). I identified two types of materials I want to use, metal and concrete.
In Maya's Hypershade I create 2 Surface Shaders (I use Lambert but any other will do), Red for Metal and Blue for Concrete. I apply those to the appropriate geometry by selecting faces and from the right click menu selecting Asign Existing Material and then... chosing one!
In 3ds Max's Slate Material Editor I create a Multi/Sub-Object and plug 2 Shaders with the same colours as above. I select my manhole, then right click the Multi/Sub-Object and Asign Material to Selection. For this to work correctly I have to set Material IDs for each surface type by selecting the geoemetry and typing in an ID number. See the pink dot in the image below?

As an aside, I can use the Select ID button to quickly select all faces asigned to the same ID and inside the Unwrap UV modifier the All IDs dropdown lets me display only the UVs with that particular ID number.
I also need a low poly mesh to bake my geoemetry on. Simple, square plane will do, it should already be UV unwrapped by default. This is used only for baking the high poly information. Decals are NOT meshes after all.
2.2 Substance 3D Painter material setup.
By default Painter uses an opaque pbr-metal-rough shader. When I create my new file using the low poly plane (Unreal Engine 4 starting assets Template) I first have to go into Shader Settings and change it to pbr-metal-rough-with-alpha-test (or alpha-blending if parts of my decal were to be semi translucent). Next in Texture Set Settings I add an Opacity channel through the + button.
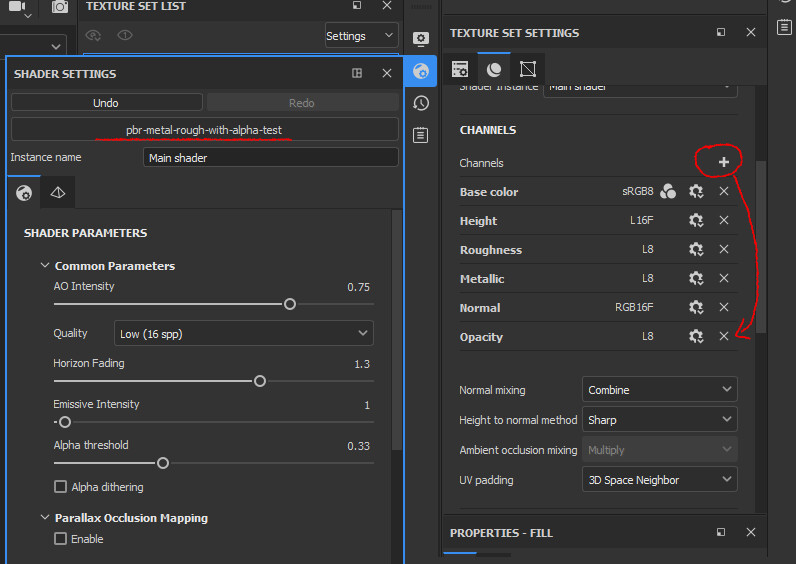
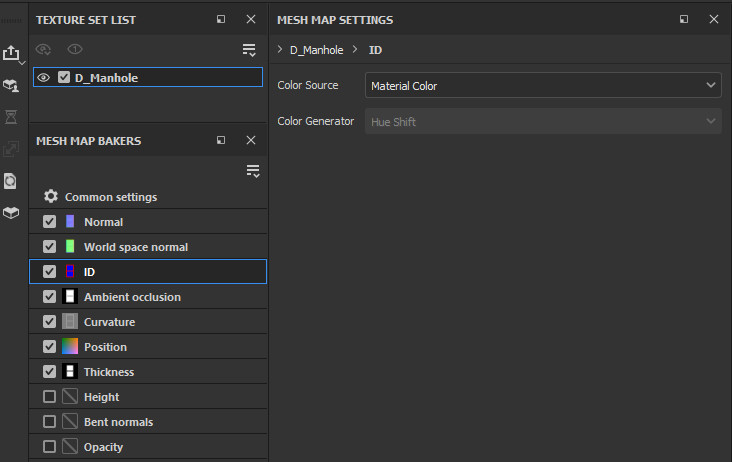
The Unreal Engine 4 Template in Painter will put the Opacity texture into the alpha channel of my base color texture. Next, I Bake Mesh Maps. From the list I select ID and change the Color Source to Material Color. I can choose to bake an Opacity map here too.
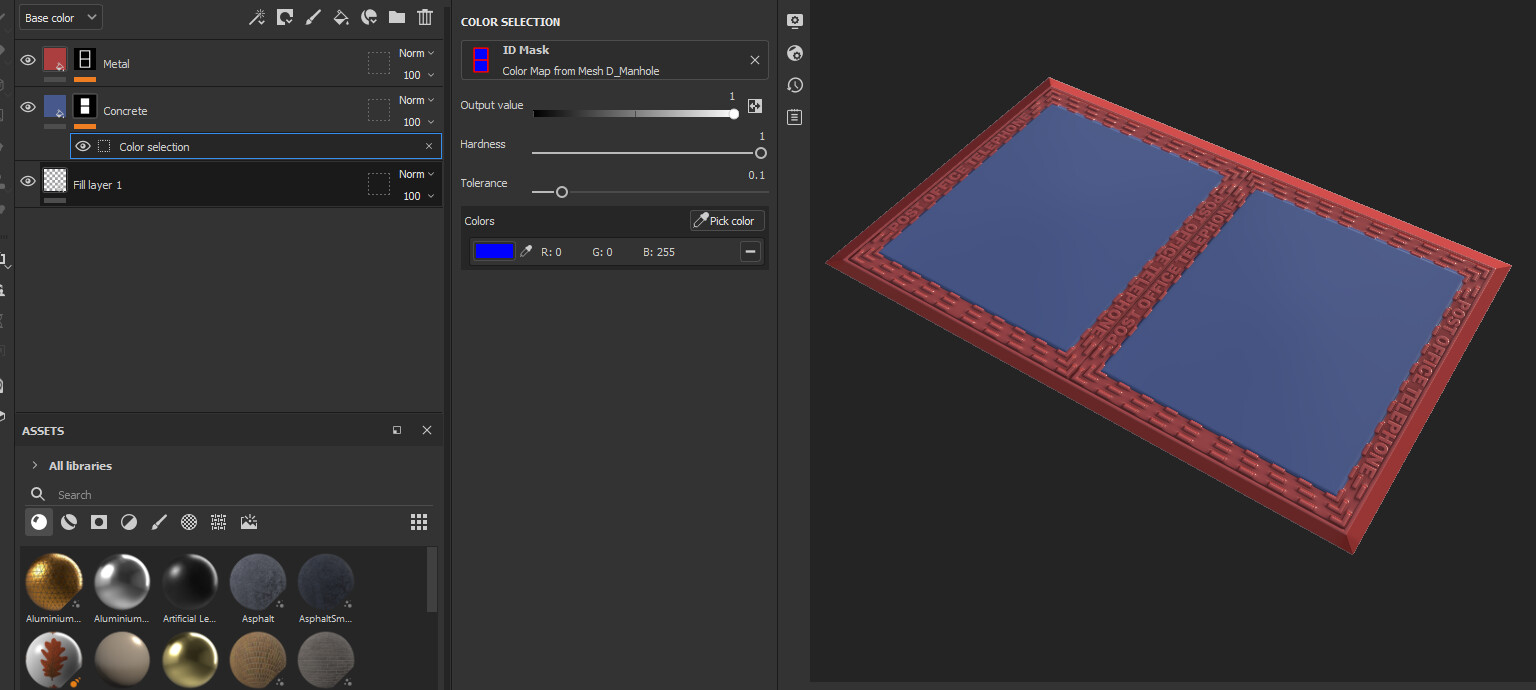
Now I can add Mask with color selection to any layer or folder and colour pick my material IDs. In my layers I now also have a grayscale Opacity Channel (op) allowing me to mask visible geometry. The rest of my Painter workflow is out of scope of this tutorial.
2.3 Substance 3D Designer material setup.
In a new Metallic Roughness graph I add an Output, set its Identifier and Lablel as Opacity and it's Group as Material. I plug a white Uniform Color into it for now, then right click it and click View in 3D View and then Opacity.

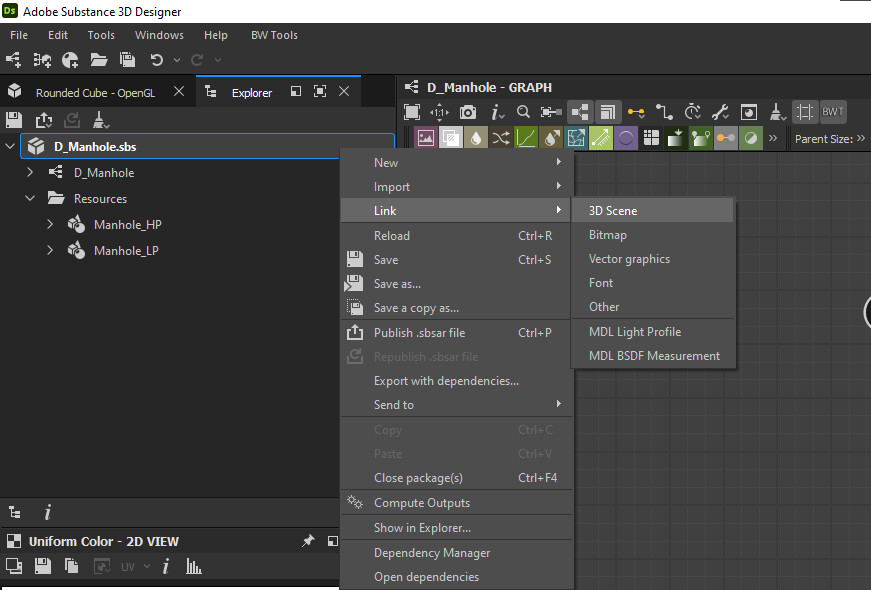
Back in the Explorer, I right-click my Package -> Link -> 3d Scene. I navigate to the high and low poly meshes for my manhole cover (which I exported as separate FBX files before) and open them. Designer puts them into a Resources folder inside the package.
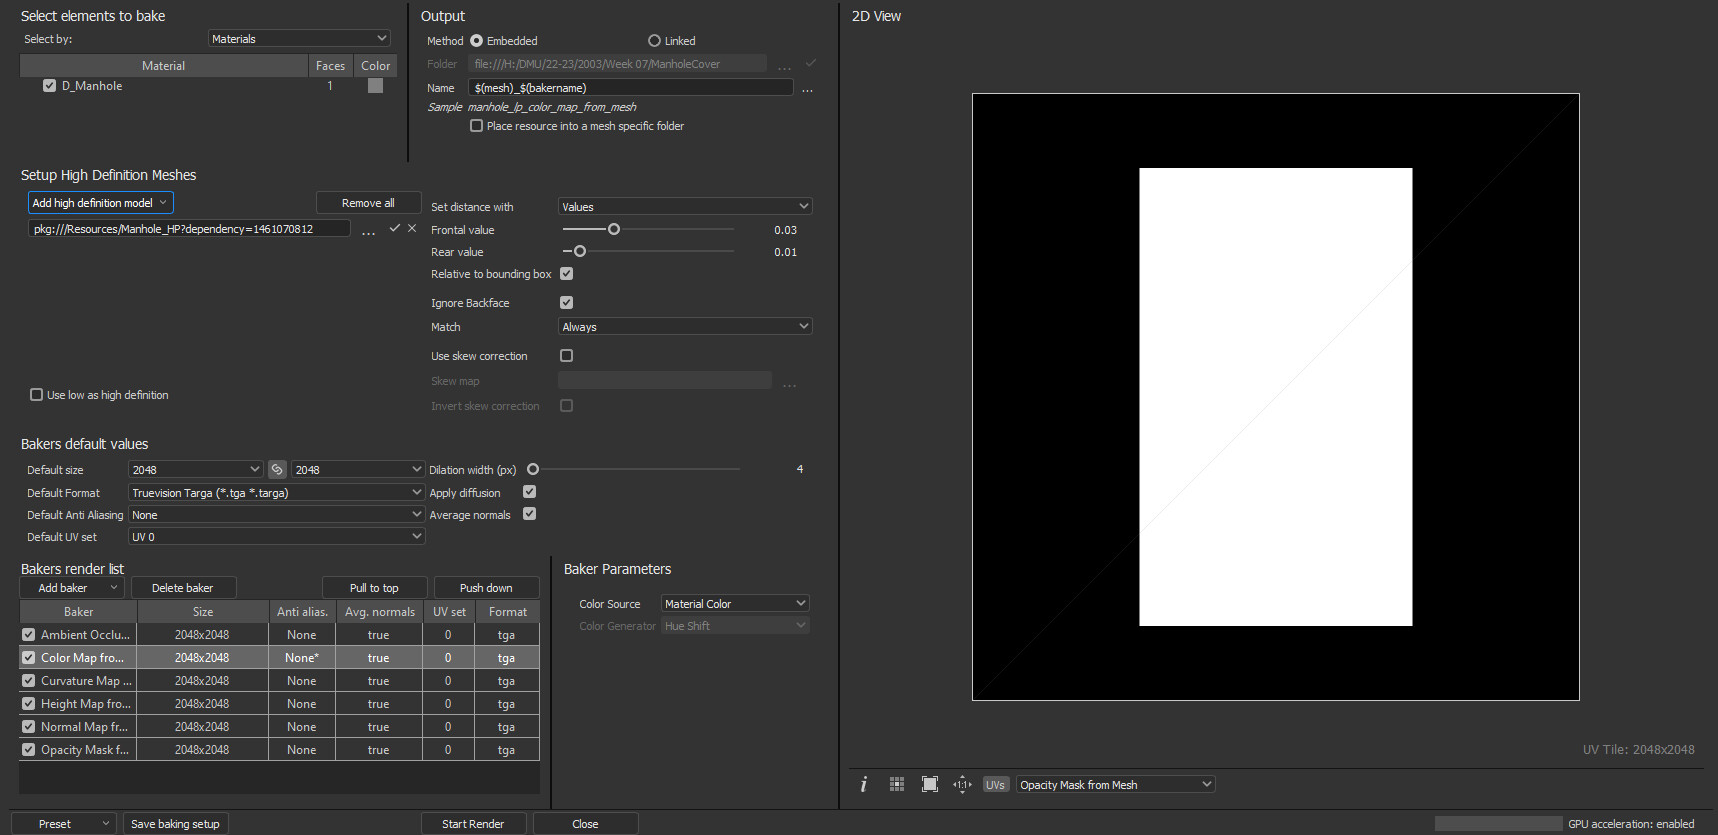
I right click my low poly and choose Bake Model information. In the baker window under Setup High Definition Meshes I select Add high definition model -> From Resources... and select my high poly.
In Baker default values I change Default Format to .tga (I could also increase Default Anti Aliasing for cleaner edges at the cost of longer baking time). From Baker render list dropdown I select Color Map from Mesh and change Color Source to Material Color.
Next I add an Opacity Mask from Mesh and then other maps I think I'll need. Last I change my Output to Embedded (into the current designer package) and click Start Render.
Baked maps are held in the Resources folder. I click and drag them into my graph. Color to Mask is the node that lets me use my Color Map for material ID masking.
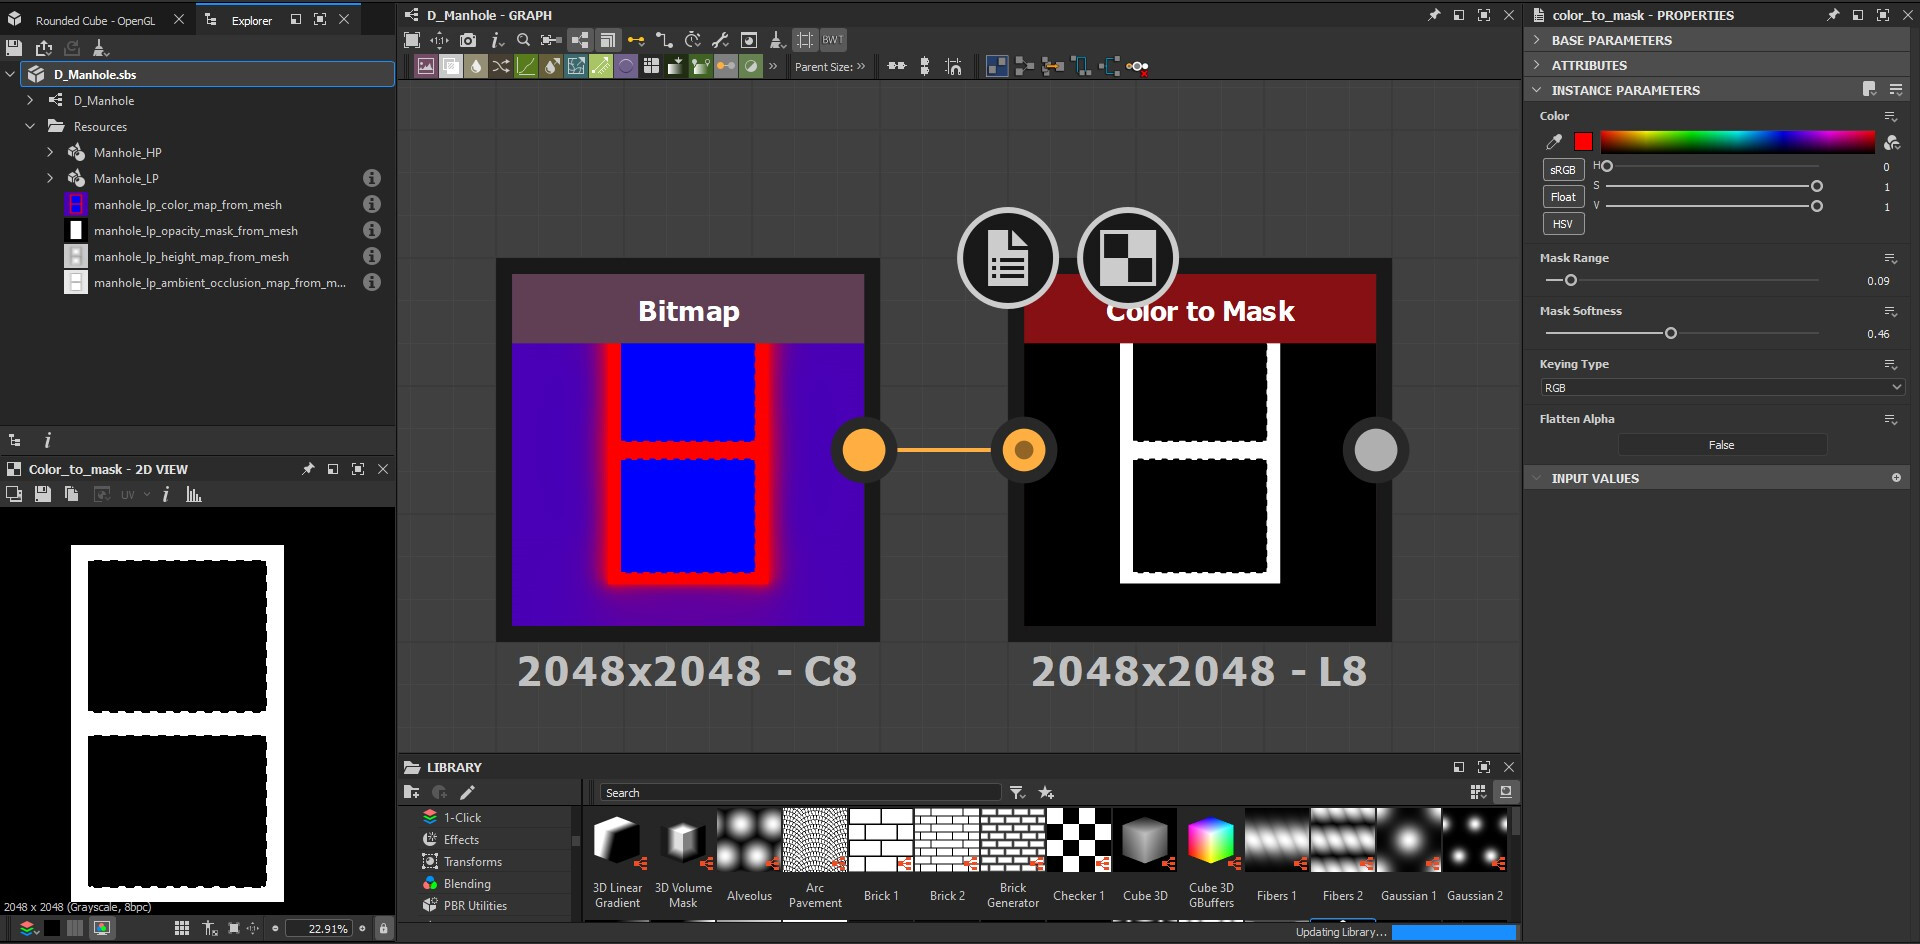
I can use a RGBA Merge node to channel pack my Opacity with other grayscale textures or Alpha Merge node to put the Opacity mask into the Alpha channel of my Base Color Output (which Painter does by default as mentioned earlier). The rest of my Designer workflow is out of scope of this tutorial.
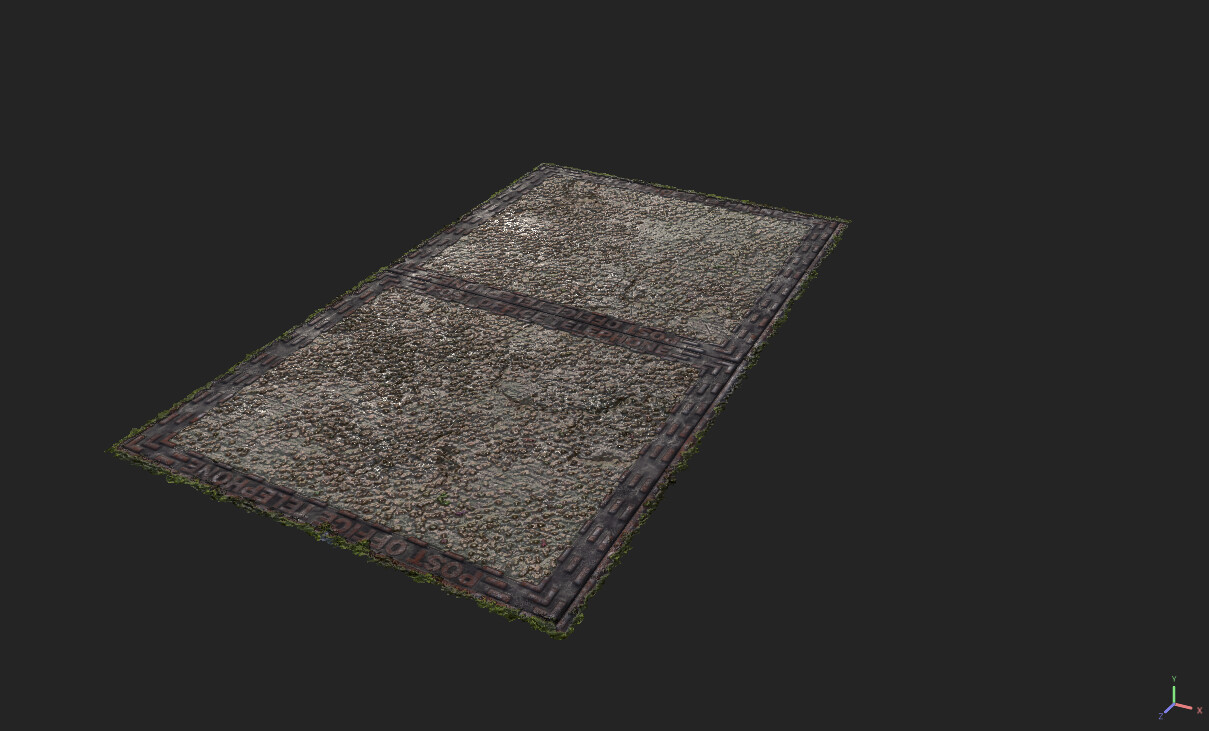
My Decal:
3. Unreal Engine setup.
I start by importing my .tga textures into Unreal Engine and setting them up for correct Compression Settings (I set my linear maps to Masks compression). Time to create my Material. As a quick recap; decals are simply materials projected onto level geometry. The basic setup is really quite simple.
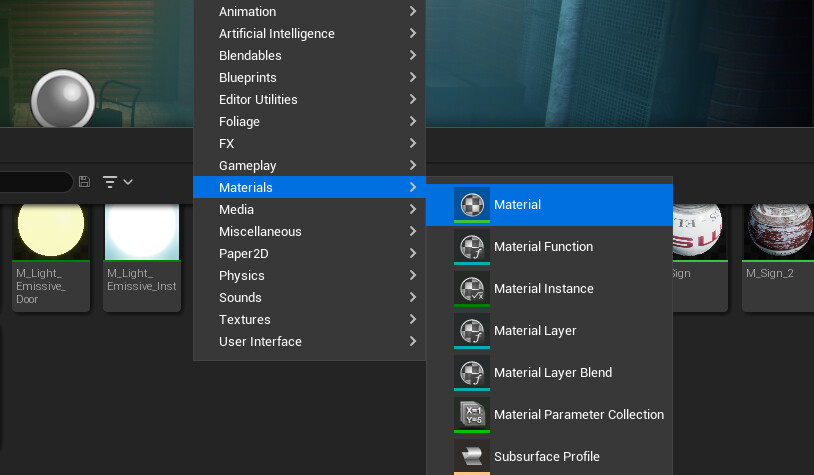
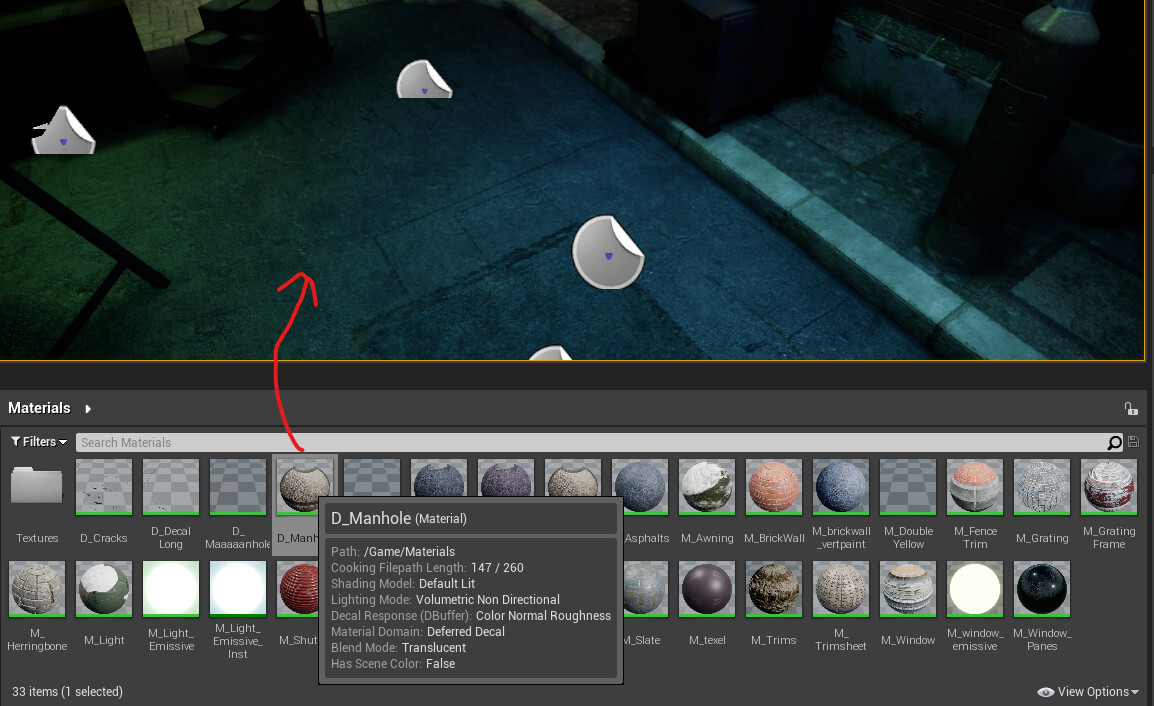
I right click into my Content Browser and go to Materials (Materials & Textures in UE4) -> Material. I name it D_Manhole then go into its Material Graph.
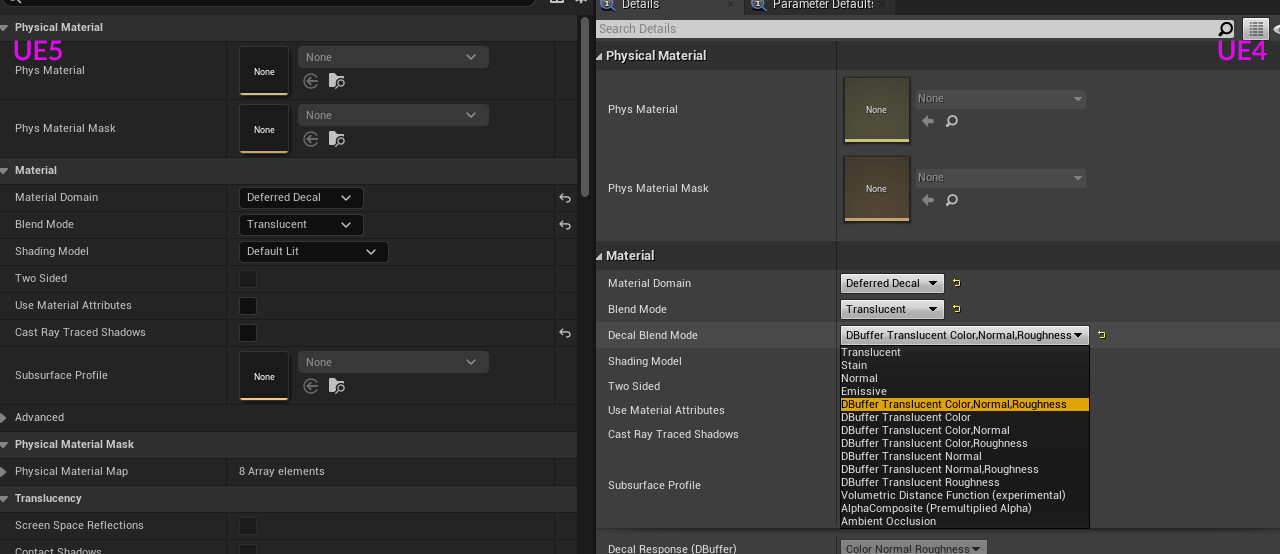
I add in my textures and click on any empty space in the Graph to bring up the Material Details. I change the Material Domain to Deferred Decal and Blend Mode to Translucent. In Unreal Engine 4 I also need to change my Decal Blend Mode to DBuffer Translucent Color,Normal,Roughness.
At last, I connect my textures to the appropriate inputs, save my materials and it's done!
3.1 Placing a decal in my scene.
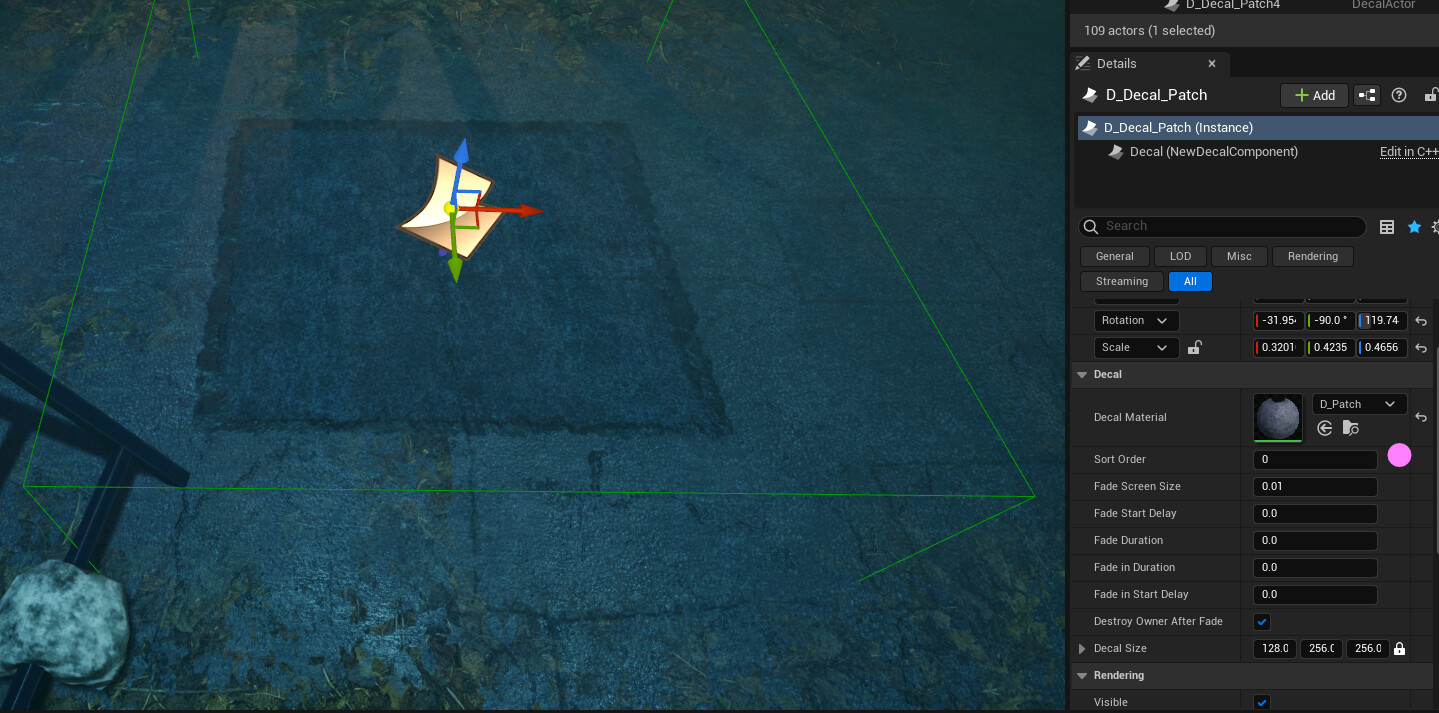
Decal Materials can simply be pulled from the Content Browser into my scene. They can be transformed (rotated, scaled, moved) just like any other asset in the level.
If I happen to have multiple decals stacked on top of each other, I can select the one and in its Details under the Decal pane change the Sort Order (lower values will appear higher in the stack).
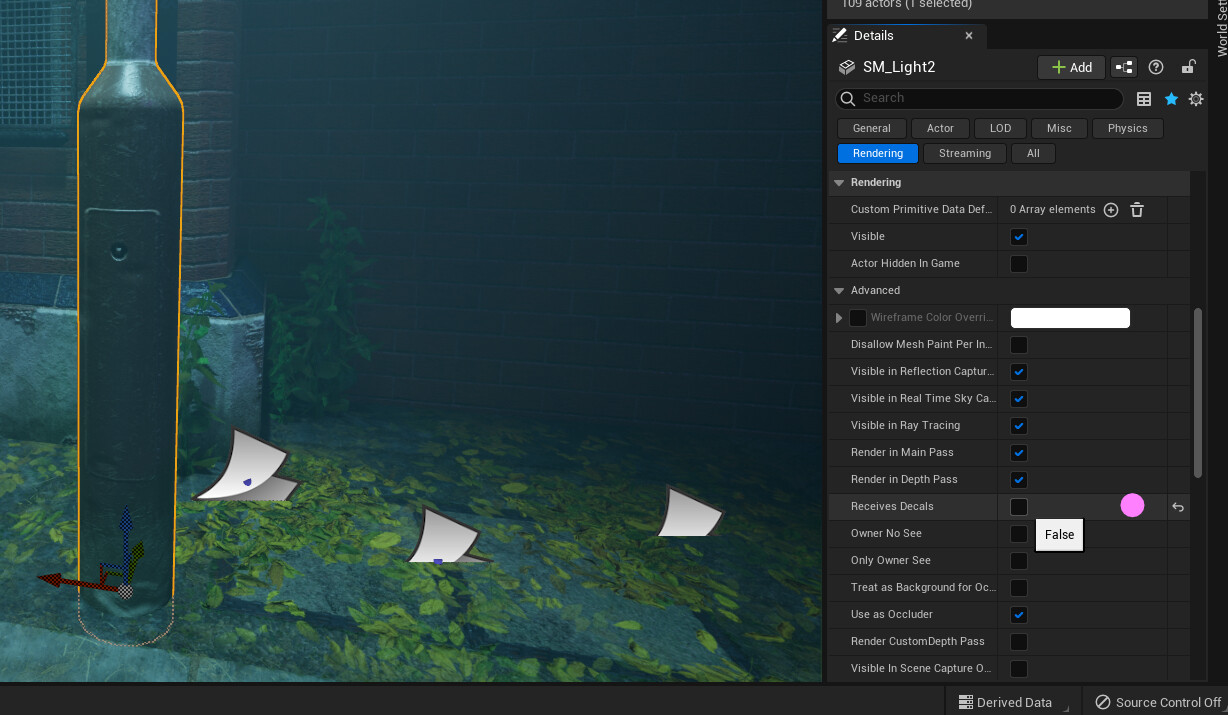
If I have a mesh in my scene I don't want receiving decals (maybe it causes nasty looking streatching?), I can select the mesh and in its Details, under Rendering Advanced find Receives Decals checkbox and untick it. Now this mesh will never receive any decals.
4. Conclusion.
This concludes a brief(ish) introduction to authoring Decals for Unreal Engine. Fantastic resource for game artists that will push your work to the next level. Now I think about it, you can use this workflow for pretty much every engine that implements decals in a similar way...